-------------------------------------------------------
Alternative Yarn – See how to change yarns here
Yarn Groups A to F – Use the same pattern and change the yarn here
Yarn usage using an alternative yarn – Use our yarn converter here
-------------------------------------------------------
= coal gray, knit | |
= coal gray, purl | |
= beige | |
= off-white |
Each of our patterns has specific tutorial videos to help you.
These step-by-step tutorials might also help you:
Why is the knitting/crochet tension so important?
Knitting tension is what determines the final measurements of your work, and is usually measured per 10 x 10 cm. It is provided like so: number of stitches in width x number of rows in height - eg: 19 stitches x 26 rows = 10 x 10 cm.
The knitting tension is very individual; some people knit/crochet loosely while others work tightly. You adjust the knitting tension with the needle size, which is why the suggested needle size only serve as a guide! You need to adjust this (up or down) to ensure that YOUR knitting tension matches the knitting tension provided in the pattern. If you work with a different knitting tension than provided you will have a different yarn consumption, and your work will have different measurements than what the pattern suggests.
The knitting tension also determines which yarns can replace each other. As long as you achieve the same knitting tension you can replace one yarn with another.
See DROPS lesson: How to measure your tension/gauge
See DROPS video: How to make a gauge tension swatch
How do I know how many balls of yarn I need?
The required amount of yarn is provided in grams, eg: 450 g. To calculate how many balls you’ll need you first need to know how many grams are in 1 ball (25g, 50g or 100g). This information is available if you click on the individual yarn quality on our pages. Divide the amount required with the amount of each ball. For example, if each ball is 50g (the most common amount), the calculation will be as follows: 450 / 50 = 9 balls.
Can I use a different yarn than what the pattern suggests?
The important thing when changing from one yarn to another is that the knitting/crochet tension remains the same. This is so that the measurements of the finished piece will be the same as on the sketch provided. It is easier to achieve the same knitting tension using yarns from the same yarn group. It is also possible to work with multiple strands of a thinner yarn to achieve the knitting tension of a thicker one. Please try our yarn converter. We recommend you to always work a test swatch.
Please NOTE: when changing yarn the garment might have a different look and feel to the garment in the photo, due to individual properties and qualities of each yarn.
See DROPS lesson: Can I use a different yarn than the one mentioned in the pattern?
What are the yarn groups?
All our yarns are categorised into yarn groups (from A to F) according to thickness and knitting tension – group A contains the thinnest yarns and group F the thickest. This makes it easier for you to find alternative yarns to our patterns, should you wish to switch yarn. All yarns within the same group have a similar knitting tension and can easily replace each other. However, different yarn qualities have different structures and properties which will give the finished work a unique look and feel.
How do I use the yarn converter?
At the top of all our patterns you’ll find a link to our yarn converter, which is a helpful tool should you wish to use a different yarn than suggested. By filling in the yarn quality you wish to replace, the amount (in your size) and number of strands, the converter will present good alternative yarns with the same knitting tension. Additionally it will tell you how much you’ll require in the new qualities and whether you’ll need to work with multiple strands. Most skeins are 50g (some are 25g or 100g).
If the pattern is worked with multiple colours, every colour will have to be converted separately. Similarly, if the pattern is worked with several strands of different yarns (for example 1 strand Alpaca and 1 strand Kid-Silk) you will have to find alternatives for each, individually.
Why do you show discontinued yarns in the patterns?
Since different yarns have different qualities and textures we have chosen to keep the original yarn in our patterns. However, you can easily find options among our available qualities by using our yarn converter, or simply pick a yarn from the same yarn group.
It is possible that some retailers still have discontinued yarns in stock, or that someone has a few skeins at home that they would like to find patterns for.
The yarn converter will provide both alternative yarn as well as required amount in the new quality.
What size should I knit?
If you think it's hard to decide what size to make, it can be a good idea to measure a garment you own already and like the size of. Then you can pick the size by comparing those measures with the ones available in the pattern's size chart.
You'll find the size chart at the bottom of the pattern.
See DROPS lesson: How to read size chart
Why do I get the wrong knitting tension with the suggested needle size?
The needle size provided in the pattern serves only as a guide, the important thing is to follow the knitting tension. And since knitting tension is very individual, you will have to adjust the needle size to ensure that YOUR tension is the same as in the pattern – maybe you’ll have to adjust 1, or even 2 needle sizes, up or down to achieve the correct tension. For this, we recommend that you work test swatches.
Should you work with a different knitting tension than the one provided, the measurements of the finished garment might deviate from the measurement sketch.
See DROPS lesson: How to measure your tension/gauge
See DROPS video: How to make a gauge tension swatch
Why is the pattern worked top-down?
Working a garment top-down provides more flexibility and room for personal adjustment. For example it is easier to try the garment on while working, as well as making adjustments to length of yoke and shoulder caps.
The instructions are carefully explaining every step, in the correct order. Diagrams are adjusted to the knitting direction and are worked as usual.
How do I work according to a knitting diagram?
The diagram depicts all rows/rounds, and every stitch seen from the right side. It is read from bottom to top, from right to left. 1 square = 1 stitch.
When working back and forth, every other row is worked from the right side and every other row is worked from the wrong side. When working from the wrong side, the diagram will have to be worked reversed: from left to right, knit stitches are purled, purl stitches are knit etc.
When working in the round every round is worked from the right side and the diagram are worked from right to left on all rounds.
See DROPS lesson: How to read knitting diagrams
How do I work according to a crochet diagram?
The diagram depicts all rows/rounds, and every stitch seen from the right side. It is worked from bottom to top, from right to left.
When working back and forth every other row is worked from the right side: from right to left and every other row is worked from the wrong side: from left to right.
When working in the round, every row in the diagram are worked from the right side, from right to left.
When working a circular diagram you start in the middle and work your way outwards, counter clockwise, row by row.
The rows usually start with a given number of chain stitches (equivalent to the height of the following stitch), this will either be depicted in the diagram or explained in the pattern.
See DROPS lesson: How to read crochet diagrams
How do I work several diagrams simultaneously on the same row/round?
Instructions for working several diagrams after each other on the same row/round, will often be written like so: “work A.1, A.2, A.3 a total of 0-0-2-3-4 times". This means you work A.1 once, then A.2 is worked once, and A.3 is repeated (in width) the number of times provided for your size – in this case like so: S = 0 times, M = 0 times, L=2 times, XL= 3 times and XXL = 4 times.
The diagrams are worked as usual: begin with the first row in A.1, then work the first row in A.2 etc.
See DROPS lesson: How to read knitting diagrams
See DROPS lesson: How to read crochet diagrams
Why are the sleeves shorter in larger sizes?
The total width of the garment (from wrist-to-wrist) will be larger in the larger sizes, despite the actual sleeves being shorter. The larger sizes have longer sleeve caps and wider shoulders, so there will be a good fit in all sizes.
Where on the garment is the length measured?
The measurement sketch/schematic drawing provides information regarding the full length of the garment. If it’s a jumper or a jacket the length is measured from the highest point on the shoulder (usually closest to the neckline), and straight down to the bottom of the garment. It is NOT measured from the tip of shoulder. Similarly, the length of yoke is measured from the highest point on the shoulder and down to where yoke is split into body and sleeves.
See DROPS lesson: How to read a schematic drawing
What is a repeat?
Diagrams are often repeated on the round or in height. 1 repeat is the diagram the way it appears in the pattern. If it says to work 5 repeats of A.1 in the round, then you work A.1 a total of 5 times after/next to each other in the round. If it says to work 2 repeats of A.1 vertically/in height you work the entire diagram once, then begin again at the start and work the entire diagram one more time.
Why does the piece start with more chain stitches than it’s worked with?
Chain stitches are slightly narrower than other stitches and to avoid working the cast-on edge too tight, we simply chain more stitches to begin with. The stitch count will be adjusted on the following row to fit the pattern and measurement sketch.
Why increase before the rib edge when the piece is worked top-down?
The rib edge is more elastic and will contract slightly compared to, for example, stocking stitch. By increasing before the rib edge, you avoid a visible difference in width between the rib edge and the rest of the body.
Why increase in the cast-off edge?
It’s very easy to cast off too tightly, and by making yarn overs while casting off (and simultaneously casting these off) you avoid a too tight cast off edge.
See DROPS video: How to bind off with yarn overs (yo)
How do I increase/decrease on every 3rd and 4th row/round alternately?
To achieve an even increase (or decrease) you can increase on, for example: every 3rd and 4th row alternately, like so: work 2 rows and increase on the 3rd row, work 3 rows and increase on the 4th. Repeat this until the increase is complete.
See DROPS lesson: Increase or decrease 1 st on every 3rd and 4th row alternately
How can I work a jacket in the round instead of back and forth?
Should you prefer to work in the round instead of back and forth, you may of course adjust the pattern. You’ll need to add steeks mid-front (usually 5 stitches), and follow the instructions. When you would normally turn and work from the wrong side, simply work across the steek and continue in the round. At the end you’ll cut the piece open, pick up stitches to work bands, and cover the cut edges.
See DROPS video: How to knit steeks and cut open
Can I work a jumper back and forth instead of in the round?
Should you prefer to work back and forth instead of in the round, you may of course adjust the pattern so you work the pieces separately and then assemble them at the end. Divide the stitches for the body in 2, add 1 edge stitch in each side (for sewing) and work the front and back pieces separately.
See DROPS lesson: Can I adapt a pattern for circular needles into straight needles?
Why is the pattern slightly different than what I see in the photo?
Pattern repeats can vary slightly in the different sizes, in order to get the correct proportions. If you’re not working the exact same size as the garment in the photo, yours might deviate slightly. This has been carefully developed and adjusted so that the complete impression of the garment is the same in all sizes.
Make sure to follow instructions and diagrams for your size!
How do I make a women’s size garment into a men’s size one?
If you have found a pattern you like which is available in women’s size it’s not very difficult to convert it to men’s size. The biggest difference will be the length of sleeves and body. Start working on the women size that you think would fit across the chest. The additional length will be worked right before you cast off for the armhole/sleeve cap. If the pattern is worked top-down you can add the length right after the armhole or before the first decrease on sleeve.
Regarding additional yarn amount, this will depend on how much length you add, but it is better with a skein too many than too few.
How do I prevent a hairy garment from shedding?
All yarns will have excess fibres (from production) that might come off as lint or shedding. Brushed yarns (ie hairier yarns) have more of these loose, excess fibres, causing more shedding.
Shedding also depends on what is worn under or over the garment, and whether this pulls at the yarn fibres. It’s therefore not possible to guarantee that there will be no shedding
Below are some tips on how to get the best result when working with hairier yarns:
1. When the garment is finished (before you wash it) shake it vigorously so the looser hairs come off. NOTE: do NOT use a lint roller, brush or any method that pulls at the yarn.
2. Place the garment in a plastic bag and put it in your freezer - the temperature will cause the fibres to become less attached to each other, and excess fibres will come off easier.
3. Leave in the freezer for a few hours before taking it out and shaking it again.
4. Wash the garment according to the instructions on the yarn label.
Why does my garment pill?
Pilling is a natural process that happens to even the most exclusive of fibers. It's a natural sign of wear and tear that is hard to avoid, and that is most visible in high friction areas of your garment like a sweater's arms and cuffs.
You can make your garment look as new by removing the pilling, using a fabric comb or a pill/lint remover.
Dashing Through the Snow |
|||||||||||||
|
|
||||||||||||
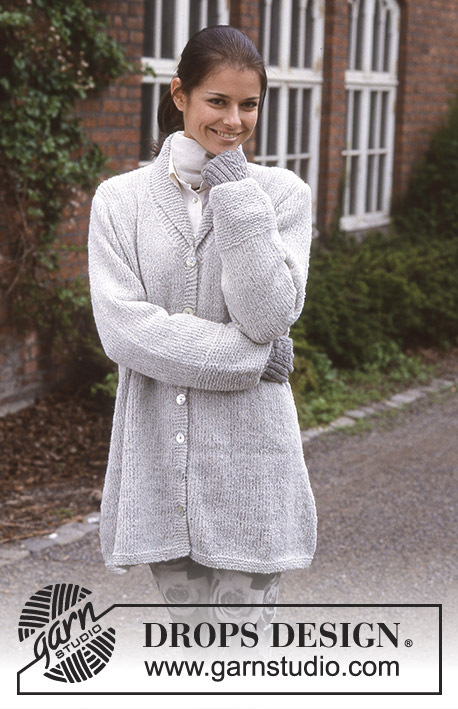
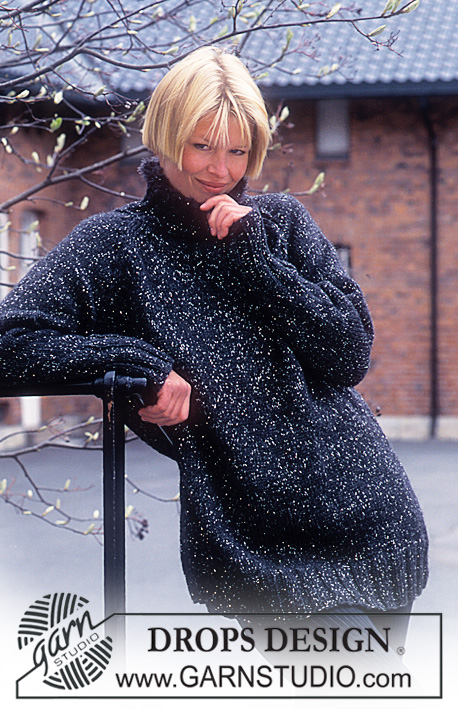
DROPS Sweater with hood in Angora Tweed. Skirt in Karisma Superwash and Gloves in Alaska.
DROPS 63-16 |
|||||||||||||
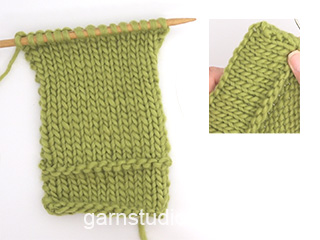
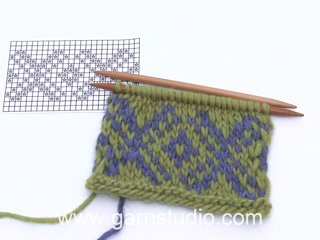
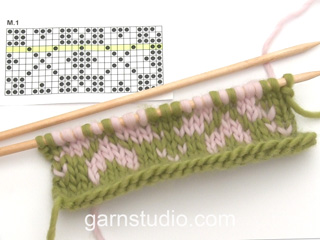
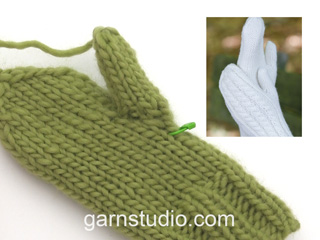
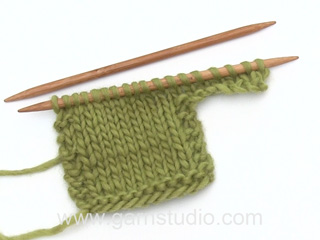
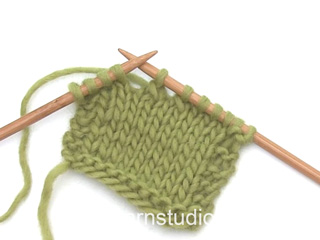
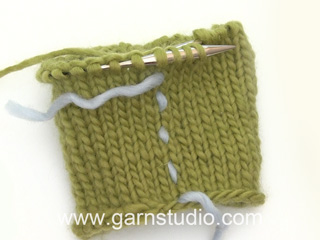
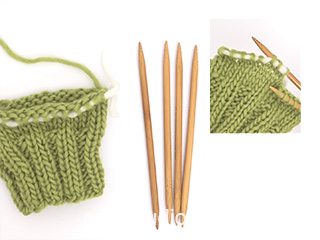
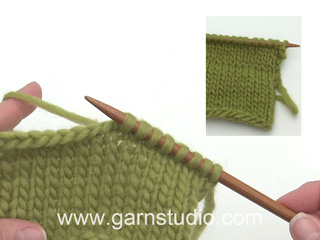
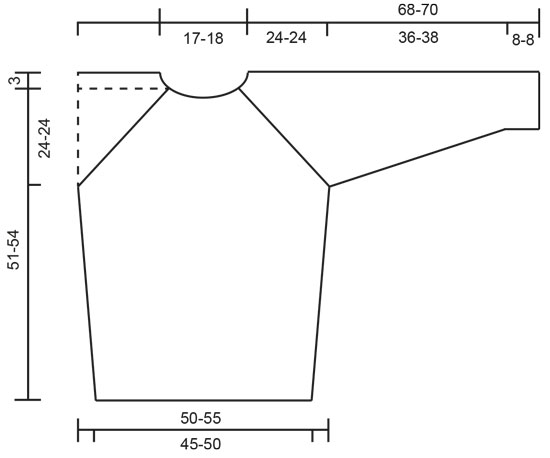
SWEATER: Gauge: 20 sts x 26 rows on larger needles in stockinette st = 10 x 10 cm [4" x 4"] Garter Stitch, when knitting flat: Knit all sts, all rows. Garter Stitch, when knitting in the round: *Rnd 1, knit. Rnd 2, purl *. Repeat from * - *. Rib: * K 2, P 2 *. Repeat from * - *. Pattern: See charts (1 chart = 1 repeat). The pattern is seen from the right side. Body: Cast on 180-200 sts on smaller circular needles with coal gray; join and place a marker at the join. Knit 4 rows garter st. Change to larger circular needles and knit Pattern 1. On the 2 rows marked with * on the chart, inc 10 sts evenly distributed = 200-220 sts. When the work measures 18-19 cm [7" - 7.5"] knit Pattern 2 - center a llama at the center front. When the work measures 27-30 cm [10-⅝" - 11.75"], knit the next row as follows: bind off 3 sts for armhole, 94-104 sts for the front, bind off 6 sts for armhole, 94-104 sts for the back, bind off 3 sts for armhole. Knit the rest of the front and back separately. Back: = 94-104 sts. Dec 1 st for armhole inside 1 edge st (knit in garter st throughout) every other row 25-31 times, then every 4th row 3-0 times. At the same time, when 1-2 decs remain, bind off the center 30-32 sts for the neck, then bind off 2 sts at each neck edge on the next row. After Pattern 2 knit 9-14 rows with coal gray. The work measures approx. 51-54 cm [20" - 21.25"], bind off. Front: Bind off for armholes and knit pattern as for the back, but when 2-4 decs remain bind off the center 26-28 sts for the neck, then bind off 2 sts at each neck edge every other row 2 times. After the last armhole dec the work measures approx. 51-54 cm [20" - 21.25"]. Bind off. Sleeve: Cast on 50-50 sts on smaller double pointed needles with coal gray; join and place a marker at the join. Knit 4 rows garter st, change to larger needles and knit Pattern 1. When the work measures 8 cm [3-⅛"], inc 1 st each side of marker 23-23 times: Size S/M: Alternately every 3rd and 4th row Size M/L: Every 4th row = 96-96 sts. When the work measures 35 cm [13.75"] knit Pattern 2 - center a llama on the sleeve. When the work measures 44-46 cm [17.25" - 18-⅛"] bind off 3 sts each side of marker (be sure this is the same pattern row of Pattern 2 as on the body) and knit the rest of the work back and forth on the needles. Dec at each side inside 1 edge st (knit in garter st throughout) every other row: 2 sts 7-7 times, 1 st 24-24 times = 14-14 sts. After Pattern 2 knit the rest with coal gray until the work measures 68-70 cm [26.75" - 27-⅝"]. Bind off. Assembly: Sew raglan seams - 1 edge st for seam has been calculated in on all parts; match up borders evenly. Neck: Pick up approx. 76 sts around the neck on smaller circular needles; join and knit rib for 12 cm [4.75"]. Bind off loosely in rib. Hood with tassel: Pick up and knit hood in the same row as the neck was picked up. Pick up 94-94 sts on smaller double pointed needles with coal gray. Knit back and forth from the center front as follows: 1 cm [3/8"] rib keeping 2 sts garter st at each side edge. Change to larger needles, increasing 12-12 sts evenly distributed on the 1st row = 106-106 sts. Then knit stockinette st keeping 2 edge sts in garter st at each side edge. When the hood measures 36-37 cm [14-⅛" - 14.5"] put sts on st holder, fold the hood double, weave together at the top. Make a tassel as follows: cut 50 strands (approx. 20 cm [7-⅞"] in length) in coal gray, knot around the center of the tassel, fold it double (= tassel becomes 10 cm [4"] long), wind a strand 4-5 times around the tassel approx. 3 cm [1.25"] below the fold. Attach the tassel to the back of the hood. Crochet border: Work 1 row of single crochet (sc) around the bottom edges of the body and sleeves and around the hood with double yarn from the right side with coal gray. Then work 1 row of sc in the opposite direction, from left to right without turning the work (reverse crochet). SKIRT IN KARISMA SUPERWASH: Sizes: Small/Medium - Medium/Large Finished measurements: hip: 80 - 85.7 cm [31.5" - 33.75"] measured approx. 18 cm [7"] below waist length: 96-100 cm [37.75" - 39-⅜"] Materials: Garnstudio KARISMA SUPERWASH from Garnstudio 100% superwash wool, 50 g./110 m./120 yards 350-400 g color no. 53, coal gray and use: Garnstudio ANGORA-TWEED 30% angora, 70% lambswool, 50 g./145 m./158 yards 50- 50 g color no. 10, off white 50- 50 g color no. 11, beige Alternate yarns (to either Karisma Superwash or Karisma Angora-Tweed): * Garnstudio MUSKAT, 100% mercerized Egyptian cotton, 50 g./100 m./109 yds * Garnstudio BOMULL-LIN, 53% Egyptian cotton, 47% linen, 50 g/85 m./93 yds DROPS 4 mm [US 6] circular needles, or size needed to obtain correct gauge. DROPS 4 mm [US F] crochet hook, or size needed to obtain correct gauge. Gauge: 21 sts x 28 rows in stockinette st = 10 x 10 cm [4" x 4"] Garter Stitch, when knitting flat: Knit all sts, all rows. Garter Stitch, when knitting in the round: *Rnd 1, knit. Rnd 2, purl *. Repeat from * - *. Skirt: Cast on 330-390 sts on circular needles with Karisma Superwash; join and place a marker at the join. Knit 4 rows garter st. Knit Pattern 1, then Pattern 3. Continue with Karisma Superwash in stockinette st. When the work measures 24-23 cm [9.5" - 9"], place 3 markers in the work with 110-130 sts between them. Dec 1 st at each side of the markers (6 decs per row) as follows: K 2 tog before the marker, after the marker slip 1, K 1, pass the slipped stitch over (psso). Dec 10-18 times every 5-3 cm [2" - 1.25"]. Then dec 1 st at each side of the markers 17-17 times every cm [3/8"] = 168-180 sts. When the work measures 93-97 cm [36-⅝" - 38-⅛"] dec 22-20 sts evenly distributed on the row = 146-160 sts. Knit 3 cm [1.25"] stockinette st, purl 1 row (for the folding edge), 3 cm [1.25"] stockinette st, bind off and fold the edge over double against the wrong side and sew. Pull elastic through the waistband. Work 1 row of single crochet (sc) around the bottom edge of the skirt with double strands of coal gray from the right side. Then work 1 row of sc in the opposite direction, from left to right without turning the work (reverse crochet). MITTENS IN ALASKA: Sizes: Women’s (Men’s) Garnstudio ALASKA from Garnstudio 100% pure new wool, 50 g/75 m./82 yards 100 (100) g color no. 02, natural DROPS 4 mm [US 6] double pointed needles, or size needed to obtain correct gauge. Gauge: 19 sts x 25 rows = 10 x 10 cm [4" x 4"] in stockinette st. Garter Stitch, when knitting flat: Knit all sts, all rows. Garter Stitch, when knitting in the round: *Rnd 1, knit. Rnd 2, purl *. Repeat from * - *. Pattern 4: * 2 rows stockinette st, purl 1 row * (seen from the right side). Mittens: The numbers in ( ) = Men’s sizes. Cast on 42 (48) sts; join and knit garter st for 3 cm [1.25"]. On the next row dec 4 sts evenly distributed = 38 (44) sts. Knit Pattern 4 for 5 cm [2"]. After Pattern 4 attach 3 markers as follows: 1 marker, 1 thumb-st (stockinette st), 1 marker (= at the side), 22 (25) sts on top of the hand, 1 marker (= at the side), 15 (18) sts on the hand. Continue in stockinette st - measure the work from here. When the work measures 1 cm [3/8"] inc 1 st on each side of the thumb-st every other row 5 times = 48 (54) sts. When the work measures 6.5 (7) cm [2.5" (2.75")] put the center 11 (11) sts for the thumb on a stitch holder. On the next row cast on 1 new st inside the sts on the st holder = 38 (44) sts. When the work measures 15 (16) cm [5-⅞" (6.25")] move the markers 2 sts up on the hand (1 marker on each side of the mitten). Then dec 1 st on each side of the markers as follows: Before the marker: slip 1, K 1, psso. After the marker: K 1, K 2 tog Dec 1 st each side of markers 2 (3) times every other row and then every row until 6 (4) sts remain on the needles. Pull a double strand through the last sts and tie off the strand. The entire mitten measures approx. 27 (29) cm [10-⅝" (11-⅜")]. Thumb: Pick up a total of 15 (18) sts around the thumb and knit stockinette st. When the thumb measures 6.5 (7) cm [2.5" (2.75")] K 2 tog across the next row and pull a doubled strand through the remaining sts. Knit another mitten, reversing all shaping. |
|||||||||||||
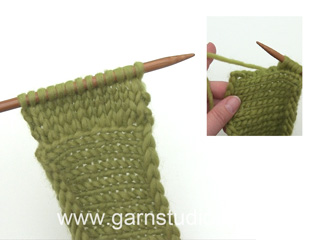
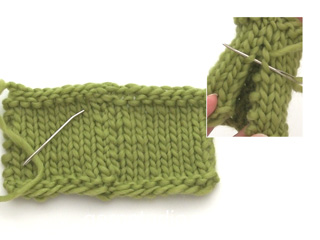
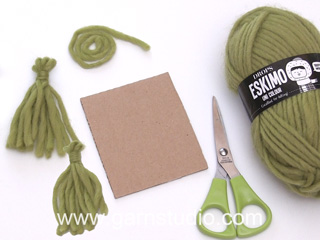
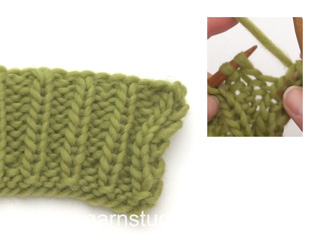
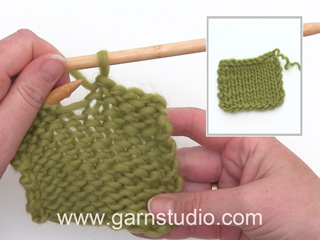
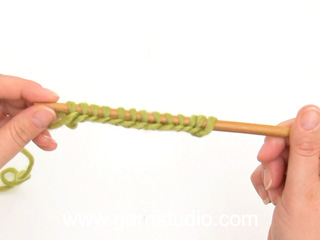
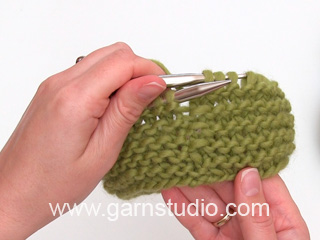
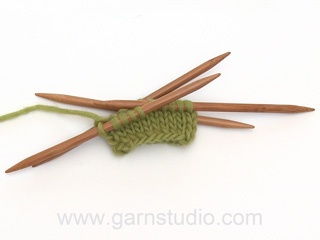
Diagram explanations |
|||||||||||||
|
|||||||||||||
Have you made this or any other of our designs? Tag your pictures in social media with #dropsdesign so we can see them! Do you need help with this pattern?You'll find tutorial videos, a Comments/Questions area and more by visiting the pattern on garnstudio.com. © 1982-2024 DROPS Design A/S. We reserve all rights. This document, including all its sub-sections, has copyrights. Read more about what you can do with our patterns at the bottom of each pattern on our site. |
With over 40 years in knitting and crochet design, DROPS Design offers one of the most extensive collections of free patterns on the internet - translated to 17 languages. As of today we count 304 catalogs and 11422 patterns - 11417 of which are translated into English (US/in).
We work hard to bring you the best knitting and crochet have to offer, inspiration and advice as well as great quality yarns at incredible prices! Would you like to use our patterns for other than personal use? You can read what you are allowed to do in the Copyright text at the bottom of all our patterns. Happy crafting!
Comments / Questions (11)
Sunniva wrote:
Vil gjerne felle ragland og ikke sy den, har dere fremgangsmåte for det?
04.03.2024 - 19:53DROPS Design answered:
Hej Sunniva, ja vi har mange opskrifter med raglan som strikkes rundt, nedefra og op, du kan følge en af disse: genser, raglan, 20masker :)
07.03.2024 - 15:30Annedore Döring wrote:
Danke für Ihre Antwort, aber Ihre Angaben beziehen sich auf die Farbe Anthrazit. Im Musterstreifen gibt es aber einen anderen Grauton, Pfefferkorn oder auch Koksgrau. Hierfür machen Sie keine Angaben für den Rock. Die Wolle für den Musterstreifen ist Auch nicht Karisma, sondern Angora Tweed oder Soft Tweed. Wieviel brauche ich für den Rock in Größe M/L in der Farbe Koksgrau oder Pfefferkorn?
13.02.2023 - 09:07DROPS Design answered:
Liebe Frau Döring, benutzen Sie unseren Garnumrechner für die ältere Garne - Angora Tweed war etwas Länger für 50 g als Karisma ist, So brauchen Sie 50 g in die 2 Farben Nr 10 und Nr 11 - dh je 2 Knäuel Karisma in diese beide Farben + 400 g Farbe Nr 53 (= 8 Knäuel) - oder von den gewünschten Farben Viel Spaß beim stricken!
13.02.2023 - 11:31Annedore Döring wrote:
Guten Tag, wieviel Wolle braucht man in der Farbe Koksgrau für den Rock in Größe M//L?
10.02.2023 - 16:51DROPS Design answered:
Liebe Frau Döring, Material sowie Nadel und Maschenprobe finden Sie etwas unten auf der Seite, nach den Erklärlungen des Pullovers, dh 350-400 g (siehe Grösse) DROPS Karisma. Viel Spaß beim stricken!
13.02.2023 - 08:45Solveig Marie Holt wrote:
Solveig marie holt nedre ringgata 78b 1723 sarpsborg norge kan du sende oppskriften hjem privat til meg i posten Dashing Through the Snow by DROPS Design
27.12.2022 - 00:54DROPS Design answered:
Hei Solveig. Det kan vi dessverre ikke gjøre, men du kan selv laste ned oppskriften (gratis) og skrive ut oppskriften du trenger. Har du ikke en printer, kan du oppsøke et bibliotekt og be de hjelpe deg. mvh DROPS Design
02.01.2023 - 13:23Ansku wrote:
Voiko karisman korvata nord-langalla?
30.05.2022 - 12:10DROPS Design answered:
Valitettavasti Karismaa ei voida korvata Nord-langalla, koska lankojen neuletiheys ei ole sama. DROPS Karisma kuuluu lankaryhmään B, voit korvata langan jollakin toisella samaan lankaryhmään kuuluvalla langalla.
31.05.2022 - 17:04Solveig Marie Holt wrote:
Hei Jeg ønsker oppskriften tilsendt hjem i posten privat Drops design modell G- 019 Drops 63-16 Min adresse: Solveig Marie holt Nedre Ringgata 78 b 1723 Sarpsborg Norge På forhånd ønskes svar, takk. Med vennlig hilsen Solveig Marie holt
04.04.2022 - 08:22DROPS Design answered:
Hei Solveig. Vi sender ikke ut oppskrifter pr post. Oppskrifter kan du skrive ut gratis fra vår nettside. Har du ikke printer, besøk ditt lokale bibliotekt, de har nok mulighet for å hjelpe deg. mvh DROPS Design
04.04.2022 - 13:21Solveig Marie Holt wrote:
Jeg vi kjøpe oppskrift og garn som tilhører denne oppskriften. Hvor mye koster det?
13.03.2022 - 09:49DROPS Design answered:
Hei Solveig. Oppskriften er gratis, den kan du skrive ut fra nettsiden vår. Garnet DROPS Karisma Angora-Tweed er utgått fra vårt sortiment. Bruk vår garnkalkulator, du finner den under eller til høyre for bildet, da finner du ut hvilken garnalternativ du kan bruke. Da fyller du inn garnmengden til den str. du ønsker, så kommer det opp alternativ og mengde garn du trenger. Til f.eks str. S/M og 350 gram Karisma Angora Tweed, kan byttes ut med 550 gram DROPS Karisma. mvh DROPS Design
14.03.2022 - 14:32Jean Voges wrote:
On sleeve decreases it says dec 1 stitch each side every other row: 2 sts 7-7 times, 1 st 24-24 times = 14-14 sts. Does the 1 st 24 times dec occur every other row and also, does this 1 st dec alternate sides? Thanks
20.02.2020 - 16:01DROPS Design answered:
Dear Mrs Voges, you will cast off 2 sts 7 times and 1 st 24 times at the beginning of each row on each side = both from RS and from WS, this means on each side on every other row. Happy knitting!
21.02.2020 - 07:37Lone Hald wrote:
Mønsteret skal hedde noget med Bolivia eller Peru for de har lamaer, ligesom der er i designet. Mvh Lone
30.10.2018 - 16:30Alexandra wrote:
Guten Tag, ich habe gerade diesen Pulli entdeckt... wo finde ich die Anleitung vom Rock dazu?
17.05.2018 - 23:21DROPS Design answered:
Liebe Alexandra, die Anleitung vom Rock finden Sie nach der Anleitung der Pulli - siehe "Roch in Karisma". Viel Spaß beim stricken!
18.05.2018 - 08:57