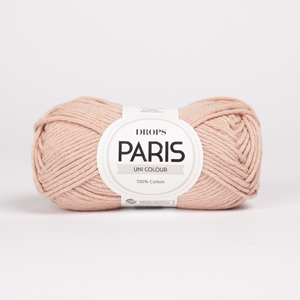
DROPS Kid-Silk uni colour 75% Mohair, 25% Silk |
6.75 $ /25g |
Order |
Clicking the ORDER button will redirect you to Wool Warehouse Direct Ltd website
The yarn cost is calculated from the pattern’s smallest size and the yarn’s cheapest product type. Looking for an even better price? You might find it on the DROPS Deals!
-------------------------------------------------------
Alternative Yarn – See how to change yarns here
Yarn Groups A to F – Use the same pattern and change the yarn here
Yarn usage using an alternative yarn – Use our yarn converter here
-------------------------------------------------------
DROPS Kid-Silk uni colour 75% Mohair, 25% Silk 6.75 $ /25g Order |
Clicking the ORDER button will redirect you to Wool Warehouse Direct Ltd website
The yarn cost is calculated from the pattern’s smallest size and the yarn’s cheapest product type. Looking for an even better price? You might find it on the DROPS Deals!
This pattern has been corrected. Click here to see the correction/s.
All measurements in charts are in cm.
= knit from the right side, purl from the wrong side | |
= purl from the right side, knit from the wrong side | |
= slip 2 stitches on cable needle in front of piece, knit 2, knit 2 from cable needle | |
= chart for size XS-S-M | |
= chart for size L-XL-XXL |
Each of our patterns has specific tutorial videos to help you.
These step-by-step tutorials might also help you:
Why is the knitting/crochet tension so important?
Knitting tension is what determines the final measurements of your work, and is usually measured per 10 x 10 cm. It is provided like so: number of stitches in width x number of rows in height - eg: 19 stitches x 26 rows = 10 x 10 cm.
The knitting tension is very individual; some people knit/crochet loosely while others work tightly. You adjust the knitting tension with the needle size, which is why the suggested needle size only serve as a guide! You need to adjust this (up or down) to ensure that YOUR knitting tension matches the knitting tension provided in the pattern. If you work with a different knitting tension than provided you will have a different yarn consumption, and your work will have different measurements than what the pattern suggests.
The knitting tension also determines which yarns can replace each other. As long as you achieve the same knitting tension you can replace one yarn with another.
See DROPS lesson: How to measure your tension/gauge
See DROPS video: How to make a gauge tension swatch
How do I know how many balls of yarn I need?
The required amount of yarn is provided in grams, eg: 450 g. To calculate how many balls you’ll need you first need to know how many grams are in 1 ball (25g, 50g or 100g). This information is available if you click on the individual yarn quality on our pages. Divide the amount required with the amount of each ball. For example, if each ball is 50g (the most common amount), the calculation will be as follows: 450 / 50 = 9 balls.
Can I use a different yarn than what the pattern suggests?
The important thing when changing from one yarn to another is that the knitting/crochet tension remains the same. This is so that the measurements of the finished piece will be the same as on the sketch provided. It is easier to achieve the same knitting tension using yarns from the same yarn group. It is also possible to work with multiple strands of a thinner yarn to achieve the knitting tension of a thicker one. Please try our yarn converter. We recommend you to always work a test swatch.
Please NOTE: when changing yarn the garment might have a different look and feel to the garment in the photo, due to individual properties and qualities of each yarn.
See DROPS lesson: Can I use a different yarn than the one mentioned in the pattern?
What are the yarn groups?
All our yarns are categorised into yarn groups (from A to F) according to thickness and knitting tension – group A contains the thinnest yarns and group F the thickest. This makes it easier for you to find alternative yarns to our patterns, should you wish to switch yarn. All yarns within the same group have a similar knitting tension and can easily replace each other. However, different yarn qualities have different structures and properties which will give the finished work a unique look and feel.
How do I use the yarn converter?
At the top of all our patterns you’ll find a link to our yarn converter, which is a helpful tool should you wish to use a different yarn than suggested. By filling in the yarn quality you wish to replace, the amount (in your size) and number of strands, the converter will present good alternative yarns with the same knitting tension. Additionally it will tell you how much you’ll require in the new qualities and whether you’ll need to work with multiple strands. Most skeins are 50g (some are 25g or 100g).
If the pattern is worked with multiple colours, every colour will have to be converted separately. Similarly, if the pattern is worked with several strands of different yarns (for example 1 strand Alpaca and 1 strand Kid-Silk) you will have to find alternatives for each, individually.
Why do you show discontinued yarns in the patterns?
Since different yarns have different qualities and textures we have chosen to keep the original yarn in our patterns. However, you can easily find options among our available qualities by using our yarn converter, or simply pick a yarn from the same yarn group.
It is possible that some retailers still have discontinued yarns in stock, or that someone has a few skeins at home that they would like to find patterns for.
The yarn converter will provide both alternative yarn as well as required amount in the new quality.
What size should I knit?
If you think it's hard to decide what size to make, it can be a good idea to measure a garment you own already and like the size of. Then you can pick the size by comparing those measures with the ones available in the pattern's size chart.
You'll find the size chart at the bottom of the pattern.
See DROPS lesson: How to read size chart
Why do I get the wrong knitting tension with the suggested needle size?
The needle size provided in the pattern serves only as a guide, the important thing is to follow the knitting tension. And since knitting tension is very individual, you will have to adjust the needle size to ensure that YOUR tension is the same as in the pattern – maybe you’ll have to adjust 1, or even 2 needle sizes, up or down to achieve the correct tension. For this, we recommend that you work test swatches.
Should you work with a different knitting tension than the one provided, the measurements of the finished garment might deviate from the measurement sketch.
See DROPS lesson: How to measure your tension/gauge
See DROPS video: How to make a gauge tension swatch
Why is the pattern worked top-down?
Working a garment top-down provides more flexibility and room for personal adjustment. For example it is easier to try the garment on while working, as well as making adjustments to length of yoke and shoulder caps.
The instructions are carefully explaining every step, in the correct order. Diagrams are adjusted to the knitting direction and are worked as usual.
How do I work according to a knitting diagram?
The diagram depicts all rows/rounds, and every stitch seen from the right side. It is read from bottom to top, from right to left. 1 square = 1 stitch.
When working back and forth, every other row is worked from the right side and every other row is worked from the wrong side. When working from the wrong side, the diagram will have to be worked reversed: from left to right, knit stitches are purled, purl stitches are knit etc.
When working in the round every round is worked from the right side and the diagram are worked from right to left on all rounds.
See DROPS lesson: How to read knitting diagrams
How do I work according to a crochet diagram?
The diagram depicts all rows/rounds, and every stitch seen from the right side. It is worked from bottom to top, from right to left.
When working back and forth every other row is worked from the right side: from right to left and every other row is worked from the wrong side: from left to right.
When working in the round, every row in the diagram are worked from the right side, from right to left.
When working a circular diagram you start in the middle and work your way outwards, counter clockwise, row by row.
The rows usually start with a given number of chain stitches (equivalent to the height of the following stitch), this will either be depicted in the diagram or explained in the pattern.
See DROPS lesson: How to read crochet diagrams
How do I work several diagrams simultaneously on the same row/round?
Instructions for working several diagrams after each other on the same row/round, will often be written like so: “work A.1, A.2, A.3 a total of 0-0-2-3-4 times". This means you work A.1 once, then A.2 is worked once, and A.3 is repeated (in width) the number of times provided for your size – in this case like so: S = 0 times, M = 0 times, L=2 times, XL= 3 times and XXL = 4 times.
The diagrams are worked as usual: begin with the first row in A.1, then work the first row in A.2 etc.
See DROPS lesson: How to read knitting diagrams
See DROPS lesson: How to read crochet diagrams
Why are the sleeves shorter in larger sizes?
The total width of the garment (from wrist-to-wrist) will be larger in the larger sizes, despite the actual sleeves being shorter. The larger sizes have longer sleeve caps and wider shoulders, so there will be a good fit in all sizes.
Where on the garment is the length measured?
The measurement sketch/schematic drawing provides information regarding the full length of the garment. If it’s a jumper or a jacket the length is measured from the highest point on the shoulder (usually closest to the neckline), and straight down to the bottom of the garment. It is NOT measured from the tip of shoulder. Similarly, the length of yoke is measured from the highest point on the shoulder and down to where yoke is split into body and sleeves.
See DROPS lesson: How to read a schematic drawing
What is a repeat?
Diagrams are often repeated on the round or in height. 1 repeat is the diagram the way it appears in the pattern. If it says to work 5 repeats of A.1 in the round, then you work A.1 a total of 5 times after/next to each other in the round. If it says to work 2 repeats of A.1 vertically/in height you work the entire diagram once, then begin again at the start and work the entire diagram one more time.
Why does the piece start with more chain stitches than it’s worked with?
Chain stitches are slightly narrower than other stitches and to avoid working the cast-on edge too tight, we simply chain more stitches to begin with. The stitch count will be adjusted on the following row to fit the pattern and measurement sketch.
Why increase before the rib edge when the piece is worked top-down?
The rib edge is more elastic and will contract slightly compared to, for example, stocking stitch. By increasing before the rib edge, you avoid a visible difference in width between the rib edge and the rest of the body.
Why increase in the cast-off edge?
It’s very easy to cast off too tightly, and by making yarn overs while casting off (and simultaneously casting these off) you avoid a too tight cast off edge.
See DROPS video: How to bind off with yarn overs (yo)
How do I increase/decrease on every 3rd and 4th row/round alternately?
To achieve an even increase (or decrease) you can increase on, for example: every 3rd and 4th row alternately, like so: work 2 rows and increase on the 3rd row, work 3 rows and increase on the 4th. Repeat this until the increase is complete.
See DROPS lesson: Increase or decrease 1 st on every 3rd and 4th row alternately
How can I work a jacket in the round instead of back and forth?
Should you prefer to work in the round instead of back and forth, you may of course adjust the pattern. You’ll need to add steeks mid-front (usually 5 stitches), and follow the instructions. When you would normally turn and work from the wrong side, simply work across the steek and continue in the round. At the end you’ll cut the piece open, pick up stitches to work bands, and cover the cut edges.
See DROPS video: How to knit steeks and cut open
Can I work a jumper back and forth instead of in the round?
Should you prefer to work back and forth instead of in the round, you may of course adjust the pattern so you work the pieces separately and then assemble them at the end. Divide the stitches for the body in 2, add 1 edge stitch in each side (for sewing) and work the front and back pieces separately.
See DROPS lesson: Can I adapt a pattern for circular needles into straight needles?
Why is the pattern slightly different than what I see in the photo?
Pattern repeats can vary slightly in the different sizes, in order to get the correct proportions. If you’re not working the exact same size as the garment in the photo, yours might deviate slightly. This has been carefully developed and adjusted so that the complete impression of the garment is the same in all sizes.
Make sure to follow instructions and diagrams for your size!
How do I make a women’s size garment into a men’s size one?
If you have found a pattern you like which is available in women’s size it’s not very difficult to convert it to men’s size. The biggest difference will be the length of sleeves and body. Start working on the women size that you think would fit across the chest. The additional length will be worked right before you cast off for the armhole/sleeve cap. If the pattern is worked top-down you can add the length right after the armhole or before the first decrease on sleeve.
Regarding additional yarn amount, this will depend on how much length you add, but it is better with a skein too many than too few.
How do I prevent a hairy garment from shedding?
All yarns will have excess fibres (from production) that might come off as lint or shedding. Brushed yarns (ie hairier yarns) have more of these loose, excess fibres, causing more shedding.
Shedding also depends on what is worn under or over the garment, and whether this pulls at the yarn fibres. It’s therefore not possible to guarantee that there will be no shedding
Below are some tips on how to get the best result when working with hairier yarns:
1. When the garment is finished (before you wash it) shake it vigorously so the looser hairs come off. NOTE: do NOT use a lint roller, brush or any method that pulls at the yarn.
2. Place the garment in a plastic bag and put it in your freezer - the temperature will cause the fibres to become less attached to each other, and excess fibres will come off easier.
3. Leave in the freezer for a few hours before taking it out and shaking it again.
4. Wash the garment according to the instructions on the yarn label.
Why does my garment pill?
Pilling is a natural process that happens to even the most exclusive of fibers. It's a natural sign of wear and tear that is hard to avoid, and that is most visible in high friction areas of your garment like a sweater's arms and cuffs.
You can make your garment look as new by removing the pilling, using a fabric comb or a pill/lint remover.
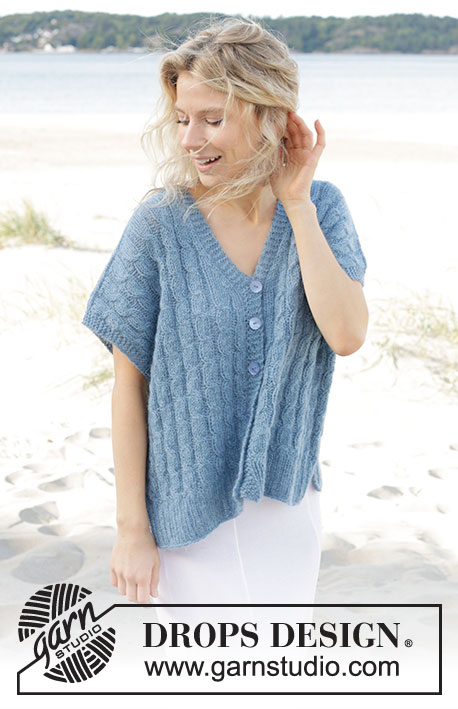
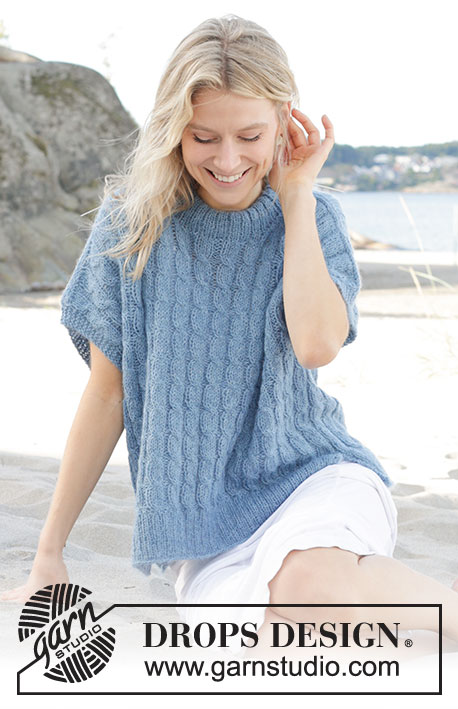
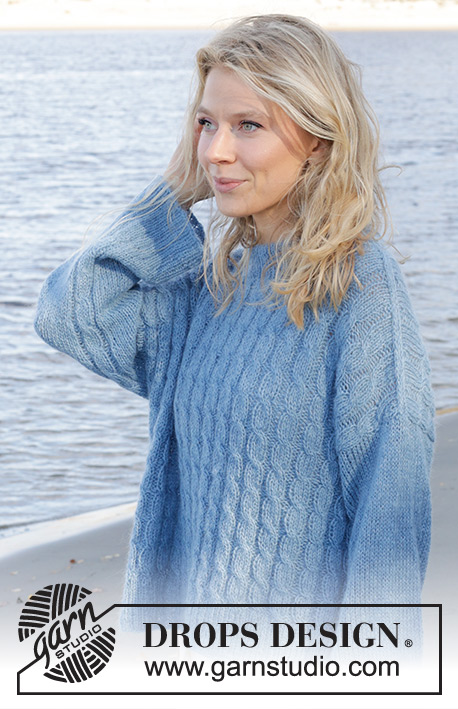
Bluebell Twist Sweater |
||||||||||||||||
|
|
|||||||||||||||
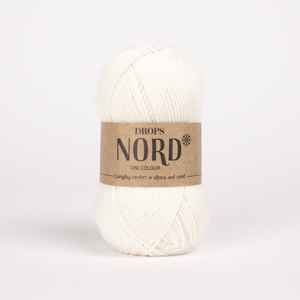
Knitted oversized sweater in DROPS Nord and DROPS Kid-Silk. Piece is knitted bottom up with cables, double neck edge, diagonal shoulders and vent in the side. Size XS – XXL.
DROPS 239-24 |
||||||||||||||||
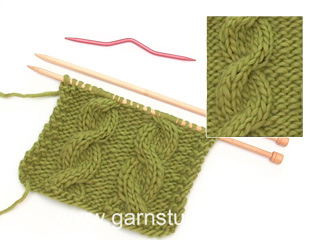
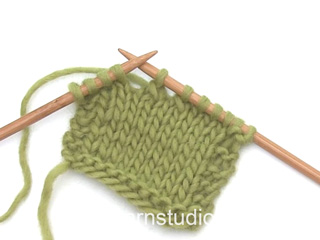
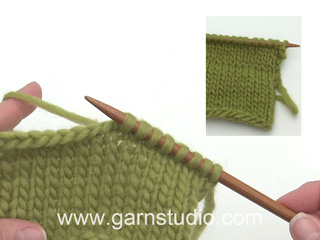
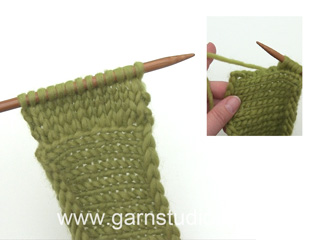
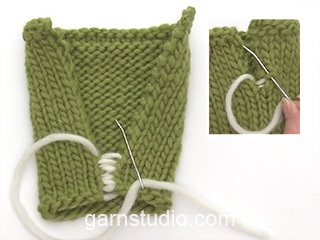
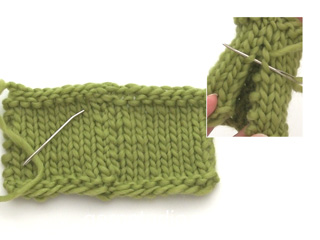
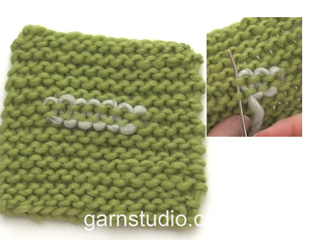
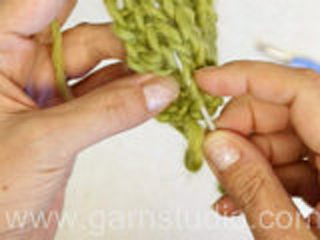
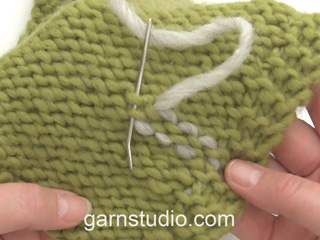
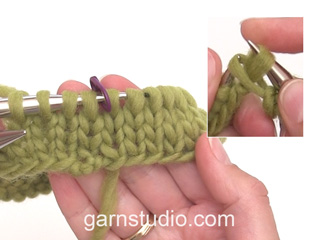
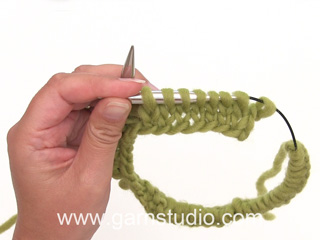
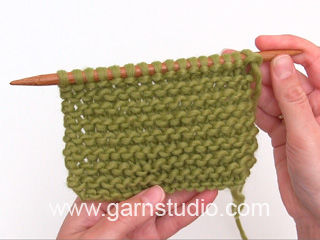
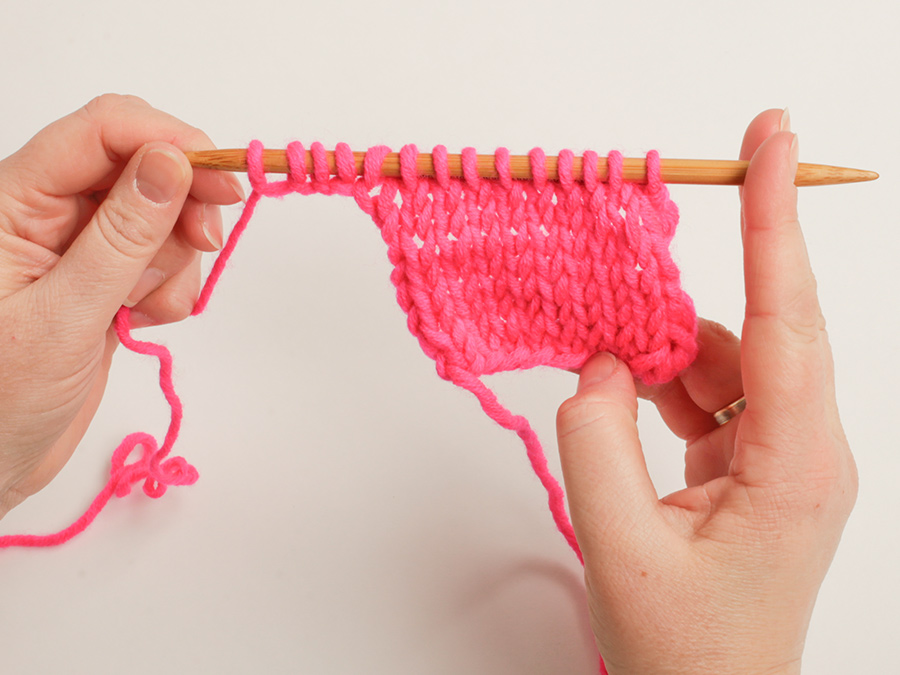
---------------------------------------------------------- EXPLANATION FOR THE PATTERN: ---------------------------------------------------------- GARTER STITCH (back and forth): Knit all rows. 1 ridge vertically = knit 2 rows. PATTERN: See diagrams A.1 and A.2. Diagrams show all rows in pattern seen from the right side. DECREASE TIP (applies to neck on front piece): All decreases are done on a row from the right side! DECREASE 1 STITCH AT THE BEGINNING OF ROW AS FOLLOWS: Work 1 stitch in garter stitch, slip 1 stitch knitwise, knit 1, pass slipped stitch over stitch worked DECREASE 1 STITCH AT THE END OF ROW AS FOLLOWS: Work until 3 stitches remain, knit 2 together and 1 stitch in garter stitch. KNITTING TOGETHER: FROM RIGHT SIDE: Slip 1 stitch knitwise, knit 1, pass slipped stitch over stitch worked. FROM WRONG SIDE: Purl 2 together. STOCKINETTE STITCH: When working from wrong side, purl and when working from right side, knit. INCREASE TIP (applies to sleeves): Work A.2 as before, knit 1, make 1 yarn over, knit until 1 stitch remains on round, make 1 yarn over and knit 1. On next round work yarn overs twisted. Then work them in stockinette stitch. ---------------------------------------------------------- START THE PIECE HERE: ---------------------------------------------------------- SWEATER - SHORT OVERVIEW OF THE PIECE: Work from bottom up. Work front piece and back piece back and forth in parts. Work sleeves bottom up in the round on double pointed needles. Work neck edge in the round at the end. BACK PIECE: Cast on 98-110-110-122-134-134 stitches on circular needle size 4 MM = US 6 with 1 strand DROPS Nord and 1 strand DROPS Kid-Silk. Purl 1 row from wrong side. Work rib, begin from right side as follows: 2 edge stitches in GARTER STITCH - read explanation above, * purl 1, knit 2 *, work from *-* until 3 stitches remain, purl 1 and 2 edge stitches in garter stitch. Continue rib like this until piece measures 8 cm = 3⅛". Switch to circular needle size 5 MM = US 8. Now work pattern as follows: 1 edge stitch in garter stitch, work A.1 16-18-18-20-22-22 times in total and 1 edge stitch in garter stitch. Continue pattern like this. REMEMBER THE KNITTING GAUGE! When piece measures 34-35-36 cm = 13⅜"-13¾"-14¼" in size L-XL-XXL, bind off stitches for armholes in size L-XL-XXL as follows: SIZE L-XL-XXL: At the beginning of the 2 next rows bind off 6 stitches for armholes = 110-122-122 stitches. Continue with pattern and 1 stitch in garter stitch in each side. ALL SIZES: = 98-110-110-110-122-122 stitches. When piece measures 49-51-53-55-57-59 cm = 19¼"-20"-21"-21⅝"-22½"-23¼", continue with knit over knit and purl over purl, i.e. the cables are done. When piece measures 50-52-54-56-58-60 cm = 19¾"-20½"-21¼"-22"-22¾"-23⅝", bind off the middle 20-22-22-24-24-26 stitches for neck (39-44-44-43-49-48 stitches remain on each shoulder) and finish each shoulder separately. On next row from the neck work as follows: Bind off 1 stitch for neck, work until 6-6-6-6-8-8 stitches remain, turn and work back. Work 6-6-6-6-8-8 stitches less on every row from the neck and bind off 1 stitch for neck on every row from the neck 4 times in total. On last row towards neck, cast on 2 new stitches at the end of row = 37-42-42-41-47-46 stitches. Now work and bind off with an edge over shoulder stitches as follows: Work stitches cast on with shoulder stitches as follows: Work * 1 stitch in STOCKINETTE STITCH – read explanation above, work next stitch together with first/next stitch from shoulder, pass the 2 stitches back on the needle they came from with strand on wrong side of piece, make sure not to tighten yarn too much *, work from *-* until all stitches from shoulder have been worked together with the 2 stitches that were cast on = 2 stitches remain. Bind off. Work the other shoulder the same way. FRONT PIECE: Cast on and work as back piece until piece measures 46-48-48-50-50-52 cm = 18"-19"-19"-19¾"-19¾"-20½" = 98-110-110-110-122-122 stitches. Now bind off the middle 18 stitches for neck (40-46-46-46-52-52 stitches remain on each shoulder) and finish each shoulder separately. Now decrease for neck and work diagonal shoulder, read both of the next sections before continuing. NECK DECREASE: Decrease 1 stitch for neck - remember DECREASE TIP, on every row from right side 5-6-6-7-7-8 times in total = 35-40-40-39-45-44 stitches. Work the stitches that do not fit a whole cable knit over knit and purl over purl. DIAGONAL SHOULDER: When piece measures 49-51-53-55-57-59 cm = 19¼"-20"-21"-21⅝"-22½"-23¼", continue with knit over knit and purl over purl, i.e. the cables are done. When piece measures 50-52-54-56-58-60 cm = 19¾"-20½"-21¼"-22"-22¾"-23⅝", work diagonal shoulder on next row from the neck as follows: Work until 6-6-6-6-8-8 stitches remain, turn and work back. Work 6-6-6-6-8-8 stitches less on every turn from the neck. Work and turn like this on every row from the neck 4 times in total. On last row towards neck, cast on 2 new stitches at the end of row = 37-42-42-41-47-46 stitches. Now work and bind off with an edge over shoulder stitches as follows: Work stitches cast on with shoulder stitches as follows: Work * 1 stitch in stockinette stitch, work next stitch together with first/next stitch from shoulder, pass the 2 stitches back on the needle they came from with strand on wrong side of piece, make sure not to tighten yarn too much *, work from *-* until all stitches from shoulder have been worked together with the 2 stitches that were cast on = 2 stitches remain. Bind off. Work the other shoulder the same way. SLEEVES: Cast on 57-60-60-63-63-66 stitches on double pointed needles size 4 MM = US 6 with 1 strand of each quality. Work rib (purl 1/knit 2) for 8 cm = 3⅛". Switch to double pointed needles size 5 MM = US 8 and work pattern as follows: Work A.2 over the first 8 stitches, work in stockinette stitch and decrease 4-5-5-6-6-7 stitches evenly over the remaining stitches = 53-55-55-57-57-59 stitches. Continue pattern like this. When piece measures 12 cm = 4¾", increase 1 stitch on each side of A.2 - read INCREASE TIP! Increase like this every 5-4-3½-3-2-2 cm = 2"-1½"-1¼"-1⅛"-¾"-¾" 6-7-8-9-11-11 times in total = 65-69-71-75-79-81 stitches. SIZE XS-S-M: Bind off when sleeve measures 42-40-41 cm = 16½"-15¾"-16⅛". Work another sleeve the same way. SIZE L-XL-XXL: When sleeve measures 38-36-37 cm = 15"-14¼"-14½", work sleeve cap back and forth on circular needle until finished measurements, i.e. divide the sleeve in the middle of A.2 and work knit over knit and purl over purl. Work until sleeve measures approx. 42-40-41 cm = 16½"-15¾"-16⅛", i.e. there is a vent of 4 cm = 1½" at the top of sleeve. Bind off. Work another sleeve the same way. ASSEMBLY: Sew shoulder seams inside 1 stitch. Sew side seams inside 1 edge stitch down until approx. 8 cm = 3⅛" remain (vent). SIZE XS-S-M: Sew in sleeves inside 1 edge stitch. SIZE L-XL-XXL: Sew sleeve cap to armhole. Then sew vent at the top of sleeve to bottom of armhole. DOUBLE NECK EDGE: Pick up 66 to 90 stitches around the neck on a short circular needle size 4 MM = US 6 with 1 strand of each quality. Number of stitches must be divisible 3. Work rib (knit 2/purl 1) in the round over all stitches Bind off when rib measures approx. 12 cm = 4¾". Fold the rib down on inside of garment. Fasten rib to get a double neck edge. To avoid a tight neck edge that sticks out it is important to keep the seam elastic. |
||||||||||||||||
Diagram explanations |
||||||||||||||||
|
||||||||||||||||
Have you made this or any other of our designs? Tag your pictures in social media with #dropsdesign so we can see them! Do you need help with this pattern?You'll find tutorial videos, a Comments/Questions area and more by visiting the pattern on garnstudio.com. © 1982-2024 DROPS Design A/S. We reserve all rights. This document, including all its sub-sections, has copyrights. Read more about what you can do with our patterns at the bottom of each pattern on our site. |
With over 40 years in knitting and crochet design, DROPS Design offers one of the most extensive collections of free patterns on the internet - translated to 17 languages. As of today we count 304 catalogs and 11422 patterns - 11417 of which are translated into English (US/in).
We work hard to bring you the best knitting and crochet have to offer, inspiration and advice as well as great quality yarns at incredible prices! Would you like to use our patterns for other than personal use? You can read what you are allowed to do in the Copyright text at the bottom of all our patterns. Happy crafting!
Comments / Questions (11)
Emily wrote:
Hi! Could I please get a more thorough explanation on the neck/shoulder shaping? This is my first sweater, and I don't fully get how this certain part should be done. TIA!
26.10.2023 - 07:24Rue wrote:
Hi! should the last row of ribbing before starting the back piece end on the wrong side?
21.10.2023 - 10:34DROPS Design answered:
Dear Rue, yes, the last row of ribbing is from the wrong side; you start the A.1 pattern on a row from the right side. Happy knitting!
23.10.2023 - 00:14Ian wrote:
Hi, is this meant to be worked in the round?
17.10.2023 - 12:03DROPS Design answered:
Dear Ian, front and back pieces are worked back and forth on circular needle, Sleeves are worked in the round on double pointed needles. Neck edge is worked in the round at the end. Happy knitting!
17.10.2023 - 15:59Cat wrote:
Hi! If I wanted to use this pattern, but without Kid-Silk yarn, should I rather use two strands of Drops Nord or one strand of Drops Air? What will give a better effect, or will it be exactly the same? I would prefer the braids be not to be too chunky.
16.10.2023 - 21:17DROPS Design answered:
Hi Cat, both options are correct as long as your swatch is the same i.e. like in the pattern (remember that needle size is only a suggestion, change needles number if necessary). Sweather made out of DROPS Air will be fluffier and lighter. 2 strands of DROPS Nord give better shape stability and less fluffiness. Happy knitting!
17.10.2023 - 09:01Illi wrote:
I´m knitting this sweater in size M and I have a question for the casting off of the armholes. The pattern only mentions the cast off for sizes L/XL/XXL. Does that mean I dont have to cast off any stitches for size M?
02.08.2023 - 22:32DROPS Design answered:
Dear Lilli, correct, you won't cast off any stitches for armhole in size M - see also chart A. Happy knitting!
03.08.2023 - 08:01Ingrid Widera wrote:
Wird die Maschenprobe denn im Muster gemacht? Ich habe die Maschenprobe glatt rechts gemacht und sie hat genau gepasst, im Muster war das Teil dann aber tatsächlich viel kleiner!?!
19.04.2023 - 08:18DROPS Design answered:
Liebe Frau Widera, die Maschenprobe wird glatt rechts gestrickt, schauen Sie vielleicht mit Ihrem DROPS Laden, ob Ihre Zöpfe nicht enger gestrickt wurden, so haben Sie vielleicht fester gestrickt als für die Maschenprobe.
19.04.2023 - 08:37Salina wrote:
Hi, what size is the model wearing?
25.03.2023 - 00:55DROPS Design answered:
Dear Salina, our models usually wear size M, but please check the measurements given on the drawing below th einstruction, and compare them to a piece that fits the intended wearer. Happy Crafting!
25.03.2023 - 01:04Abc wrote:
Flow with waves
22.01.2023 - 17:35Jenny Peters wrote:
Ocean warmth
19.01.2023 - 21:15May-Britt wrote:
Wavy Blue
19.01.2023 - 19:27