The yarn cost is calculated from the pattern’s smallest size and the yarn’s cheapest product type. Looking for an even better price? You might find it on the DROPS Deals!
-------------------------------------------------------
Alternative Yarn – See how to change yarns here
Yarn Groups A to F – Use the same pattern and change the yarn here
Yarn usage using an alternative yarn – Use our yarn converter here
-------------------------------------------------------
The yarn cost is calculated from the pattern’s smallest size and the yarn’s cheapest product type. Looking for an even better price? You might find it on the DROPS Deals!
All measurements in charts are in cm.
= K from RS, P from WS | |
= 1 YO, K on next row | |
= slip 1 st as if to K, K2, psso |
Each of our patterns has specific tutorial videos to help you.
These step-by-step tutorials might also help you:
Why is the knitting/crochet tension so important?
Knitting tension is what determines the final measurements of your work, and is usually measured per 10 x 10 cm. It is provided like so: number of stitches in width x number of rows in height - eg: 19 stitches x 26 rows = 10 x 10 cm.
The knitting tension is very individual; some people knit/crochet loosely while others work tightly. You adjust the knitting tension with the needle size, which is why the suggested needle size only serve as a guide! You need to adjust this (up or down) to ensure that YOUR knitting tension matches the knitting tension provided in the pattern. If you work with a different knitting tension than provided you will have a different yarn consumption, and your work will have different measurements than what the pattern suggests.
The knitting tension also determines which yarns can replace each other. As long as you achieve the same knitting tension you can replace one yarn with another.
See DROPS lesson: How to measure your tension/gauge
See DROPS video: How to make a gauge tension swatch
How do I know how many balls of yarn I need?
The required amount of yarn is provided in grams, eg: 450 g. To calculate how many balls you’ll need you first need to know how many grams are in 1 ball (25g, 50g or 100g). This information is available if you click on the individual yarn quality on our pages. Divide the amount required with the amount of each ball. For example, if each ball is 50g (the most common amount), the calculation will be as follows: 450 / 50 = 9 balls.
Can I use a different yarn than what the pattern suggests?
The important thing when changing from one yarn to another is that the knitting/crochet tension remains the same. This is so that the measurements of the finished piece will be the same as on the sketch provided. It is easier to achieve the same knitting tension using yarns from the same yarn group. It is also possible to work with multiple strands of a thinner yarn to achieve the knitting tension of a thicker one. Please try our yarn converter. We recommend you to always work a test swatch.
Please NOTE: when changing yarn the garment might have a different look and feel to the garment in the photo, due to individual properties and qualities of each yarn.
See DROPS lesson: Can I use a different yarn than the one mentioned in the pattern?
What are the yarn groups?
All our yarns are categorised into yarn groups (from A to F) according to thickness and knitting tension – group A contains the thinnest yarns and group F the thickest. This makes it easier for you to find alternative yarns to our patterns, should you wish to switch yarn. All yarns within the same group have a similar knitting tension and can easily replace each other. However, different yarn qualities have different structures and properties which will give the finished work a unique look and feel.
How do I use the yarn converter?
At the top of all our patterns you’ll find a link to our yarn converter, which is a helpful tool should you wish to use a different yarn than suggested. By filling in the yarn quality you wish to replace, the amount (in your size) and number of strands, the converter will present good alternative yarns with the same knitting tension. Additionally it will tell you how much you’ll require in the new qualities and whether you’ll need to work with multiple strands. Most skeins are 50g (some are 25g or 100g).
If the pattern is worked with multiple colours, every colour will have to be converted separately. Similarly, if the pattern is worked with several strands of different yarns (for example 1 strand Alpaca and 1 strand Kid-Silk) you will have to find alternatives for each, individually.
Why do you show discontinued yarns in the patterns?
Since different yarns have different qualities and textures we have chosen to keep the original yarn in our patterns. However, you can easily find options among our available qualities by using our yarn converter, or simply pick a yarn from the same yarn group.
It is possible that some retailers still have discontinued yarns in stock, or that someone has a few skeins at home that they would like to find patterns for.
The yarn converter will provide both alternative yarn as well as required amount in the new quality.
What size should I knit?
If you think it's hard to decide what size to make, it can be a good idea to measure a garment you own already and like the size of. Then you can pick the size by comparing those measures with the ones available in the pattern's size chart.
You'll find the size chart at the bottom of the pattern.
See DROPS lesson: How to read size chart
Why do I get the wrong knitting tension with the suggested needle size?
The needle size provided in the pattern serves only as a guide, the important thing is to follow the knitting tension. And since knitting tension is very individual, you will have to adjust the needle size to ensure that YOUR tension is the same as in the pattern – maybe you’ll have to adjust 1, or even 2 needle sizes, up or down to achieve the correct tension. For this, we recommend that you work test swatches.
Should you work with a different knitting tension than the one provided, the measurements of the finished garment might deviate from the measurement sketch.
See DROPS lesson: How to measure your tension/gauge
See DROPS video: How to make a gauge tension swatch
Why is the pattern worked top-down?
Working a garment top-down provides more flexibility and room for personal adjustment. For example it is easier to try the garment on while working, as well as making adjustments to length of yoke and shoulder caps.
The instructions are carefully explaining every step, in the correct order. Diagrams are adjusted to the knitting direction and are worked as usual.
How do I work according to a knitting diagram?
The diagram depicts all rows/rounds, and every stitch seen from the right side. It is read from bottom to top, from right to left. 1 square = 1 stitch.
When working back and forth, every other row is worked from the right side and every other row is worked from the wrong side. When working from the wrong side, the diagram will have to be worked reversed: from left to right, knit stitches are purled, purl stitches are knit etc.
When working in the round every round is worked from the right side and the diagram are worked from right to left on all rounds.
See DROPS lesson: How to read knitting diagrams
How do I work according to a crochet diagram?
The diagram depicts all rows/rounds, and every stitch seen from the right side. It is worked from bottom to top, from right to left.
When working back and forth every other row is worked from the right side: from right to left and every other row is worked from the wrong side: from left to right.
When working in the round, every row in the diagram are worked from the right side, from right to left.
When working a circular diagram you start in the middle and work your way outwards, counter clockwise, row by row.
The rows usually start with a given number of chain stitches (equivalent to the height of the following stitch), this will either be depicted in the diagram or explained in the pattern.
See DROPS lesson: How to read crochet diagrams
How do I work several diagrams simultaneously on the same row/round?
Instructions for working several diagrams after each other on the same row/round, will often be written like so: “work A.1, A.2, A.3 a total of 0-0-2-3-4 times". This means you work A.1 once, then A.2 is worked once, and A.3 is repeated (in width) the number of times provided for your size – in this case like so: S = 0 times, M = 0 times, L=2 times, XL= 3 times and XXL = 4 times.
The diagrams are worked as usual: begin with the first row in A.1, then work the first row in A.2 etc.
See DROPS lesson: How to read knitting diagrams
See DROPS lesson: How to read crochet diagrams
Why are the sleeves shorter in larger sizes?
The total width of the garment (from wrist-to-wrist) will be larger in the larger sizes, despite the actual sleeves being shorter. The larger sizes have longer sleeve caps and wider shoulders, so there will be a good fit in all sizes.
Where on the garment is the length measured?
The measurement sketch/schematic drawing provides information regarding the full length of the garment. If it’s a jumper or a jacket the length is measured from the highest point on the shoulder (usually closest to the neckline), and straight down to the bottom of the garment. It is NOT measured from the tip of shoulder. Similarly, the length of yoke is measured from the highest point on the shoulder and down to where yoke is split into body and sleeves.
See DROPS lesson: How to read a schematic drawing
What is a repeat?
Diagrams are often repeated on the round or in height. 1 repeat is the diagram the way it appears in the pattern. If it says to work 5 repeats of A.1 in the round, then you work A.1 a total of 5 times after/next to each other in the round. If it says to work 2 repeats of A.1 vertically/in height you work the entire diagram once, then begin again at the start and work the entire diagram one more time.
Why does the piece start with more chain stitches than it’s worked with?
Chain stitches are slightly narrower than other stitches and to avoid working the cast-on edge too tight, we simply chain more stitches to begin with. The stitch count will be adjusted on the following row to fit the pattern and measurement sketch.
Why increase before the rib edge when the piece is worked top-down?
The rib edge is more elastic and will contract slightly compared to, for example, stocking stitch. By increasing before the rib edge, you avoid a visible difference in width between the rib edge and the rest of the body.
Why increase in the cast-off edge?
It’s very easy to cast off too tightly, and by making yarn overs while casting off (and simultaneously casting these off) you avoid a too tight cast off edge.
See DROPS video: How to bind off with yarn overs (yo)
How do I increase/decrease on every 3rd and 4th row/round alternately?
To achieve an even increase (or decrease) you can increase on, for example: every 3rd and 4th row alternately, like so: work 2 rows and increase on the 3rd row, work 3 rows and increase on the 4th. Repeat this until the increase is complete.
See DROPS lesson: Increase or decrease 1 st on every 3rd and 4th row alternately
How can I work a jacket in the round instead of back and forth?
Should you prefer to work in the round instead of back and forth, you may of course adjust the pattern. You’ll need to add steeks mid-front (usually 5 stitches), and follow the instructions. When you would normally turn and work from the wrong side, simply work across the steek and continue in the round. At the end you’ll cut the piece open, pick up stitches to work bands, and cover the cut edges.
See DROPS video: How to knit steeks and cut open
Can I work a jumper back and forth instead of in the round?
Should you prefer to work back and forth instead of in the round, you may of course adjust the pattern so you work the pieces separately and then assemble them at the end. Divide the stitches for the body in 2, add 1 edge stitch in each side (for sewing) and work the front and back pieces separately.
See DROPS lesson: Can I adapt a pattern for circular needles into straight needles?
Why is the pattern slightly different than what I see in the photo?
Pattern repeats can vary slightly in the different sizes, in order to get the correct proportions. If you’re not working the exact same size as the garment in the photo, yours might deviate slightly. This has been carefully developed and adjusted so that the complete impression of the garment is the same in all sizes.
Make sure to follow instructions and diagrams for your size!
How do I make a women’s size garment into a men’s size one?
If you have found a pattern you like which is available in women’s size it’s not very difficult to convert it to men’s size. The biggest difference will be the length of sleeves and body. Start working on the women size that you think would fit across the chest. The additional length will be worked right before you cast off for the armhole/sleeve cap. If the pattern is worked top-down you can add the length right after the armhole or before the first decrease on sleeve.
Regarding additional yarn amount, this will depend on how much length you add, but it is better with a skein too many than too few.
How do I prevent a hairy garment from shedding?
All yarns will have excess fibres (from production) that might come off as lint or shedding. Brushed yarns (ie hairier yarns) have more of these loose, excess fibres, causing more shedding.
Shedding also depends on what is worn under or over the garment, and whether this pulls at the yarn fibres. It’s therefore not possible to guarantee that there will be no shedding
Below are some tips on how to get the best result when working with hairier yarns:
1. When the garment is finished (before you wash it) shake it vigorously so the looser hairs come off. NOTE: do NOT use a lint roller, brush or any method that pulls at the yarn.
2. Place the garment in a plastic bag and put it in your freezer - the temperature will cause the fibres to become less attached to each other, and excess fibres will come off easier.
3. Leave in the freezer for a few hours before taking it out and shaking it again.
4. Wash the garment according to the instructions on the yarn label.
Why does my garment pill?
Pilling is a natural process that happens to even the most exclusive of fibers. It's a natural sign of wear and tear that is hard to avoid, and that is most visible in high friction areas of your garment like a sweater's arms and cuffs.
You can make your garment look as new by removing the pilling, using a fabric comb or a pill/lint remover.
Spring Lilac |
||||||||||
|
||||||||||
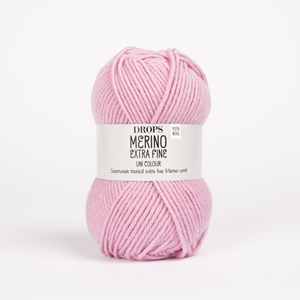
Knitted DROPS top with cables and round yoke in ”Merino Extra Fine”. Size S to XXXL.
DROPS 123-7 |
||||||||||
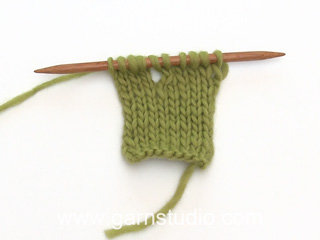
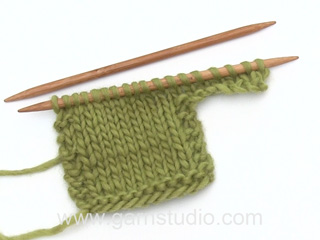
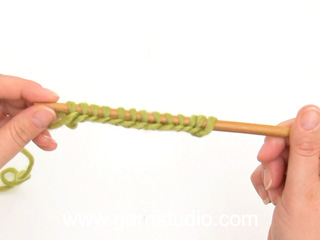
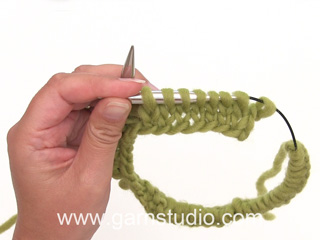
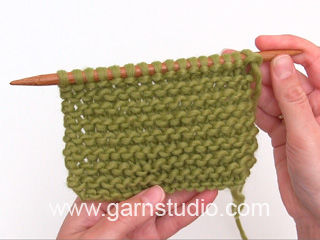
GARTER ST (back and forth on needle): K all rows. PATTERN: See diagram M.1, diagram shows the pattern from RS. BUTTONHOLES: Make buttonholes on right front band. 1 buttonhole = K tog 3rd and 4th st from mid front and make 1 YO. Make buttonholes when piece measures: SIZE S: 3, 10, 17, 25, 33, 41, 49, 57 cm /1 1/8",4",6¾",9¾",13",16 1/8",19¼",22½''. SIZE M: 3, 11, 19, 27, 35, 43, 51, 59 cm / 1 1/8",4 3/8",7½",10 5/8",13¾",17",20",23¼". SIZE L: 3, 11, 19, 27, 35, 43, 52, 61 cm / 1 1/8",4 3/8",7½",10 5/8",13¾",17",20½",24". SIZE XL: 3, 10, 17, 24, 31, 39, 47, 55, 63 cm / 1 1/8",4",6¾",9½",12¼",15¼",18½",21 5/8",24¾". SIZE XXL: 3, 10, 17, 25, 33, 41, 49, 57, 65 cm / 1 1/8",4",6¾",9¾",13",16 1/8",19¼",22½'',25½". SIZE XXXL: 3, 11, 19, 27, 35, 43, 51, 59, 67 cm / 1 1/8",4 3/8",7½",10 5/8",13¾",17",20",23¼",26 3/8". -------------------------------------------------------- BODY PIECE: Worked back and forth on circular needle. Cast on 181-193-211-235-259-283 sts (includes 5 front band sts each side towards front edge) on circular needle size 4 mm / US 6 with Merino. Work 4 rows GARTER ST – see above! K 1 row from RS and continue as follows from WS: 5 garter sts, * P3, K3 *, repeat from *-* and finish with P3 and 5 garter sts. Remember BUTTONHOLES on right front band – see above. Work 3 cm / 1 1/8'' rib, then continue in stockinette st with 5 garter sts each side. REMEMBER THE GAUGE! Insert 2 markers in piece, 48-51-55-62-67-73 sts in from each side (back piece = 85-91-101-111-125-137 sts). When piece measures approx 37-38-39-40-41-42 cm / 14½''-15''-15¼''-15¾''-16 1/8''-16½'' (adjust so that next row is from WS) K 2 rows on 16 sts each side (= 8 sts each side of marker) with remaining sts as before. On next row bind off the middle 8 sts each side for armhole (= 4 sts each side of marker) – bind off with K sts from WS, work remaining sts on row. There are now 165-177-195-219-243-267 sts on needle. Work next row as follows from RS: work 44-47-51-58-63-69 sts (= front piece), cast on 59-61-65-67-71-76 new sts over the 8 bind off sts, work 77-83-93-103-117-129 sts (= back piece), cast on 59-61-65-67-71-76 new sts over the 8 bind off sts, work 44-47-51-58-63-69 sts (= front piece) = 283-299-325-353-385-419 sts. K 3 rows on all sts. K 1 row from RS, at the same time inc 30-34-38-40-48-54 sts evenly (do not inc on front bands) = 313-333-363-393-433-473 sts. P 1 row (5 front band sts in garter st as before). NOW MEASURE PIECE FROM HERE! Continue as follows from RS: 5 garter sts, M.1 (= 3 sts), * P7, M.1 *, repeat from *-* a total of 30-32-35-38-42-46 times and finish with 5 garter sts. Continue this pattern, AT THE SAME TIME when piece measures 2 cm / 3/4'' dec 1 st in each P-section, and repeat the dec on every 3.5-3.5-3.5-4-4-4.5 cm / 1 1/4"-1 1/4"-1 1/4"-1½"-1½"-1 3/4" a total of 6 times, dec by P2 tog on the right and left side of P-section alternately = 133-141-153-165-181-197 sts. Continue until piece measures 20-21-22-23-24-25 cm / 8''-8¼''-8¾''-9''-9½''-9¾'', K 1 row from RS, AT THE SAME TIME K tog the first 2 sts in each M.1 = 102-108-117-126-138-150 sts. K 1 row, work 4 rows garter st and bind off. Sew buttons on left front band. |
||||||||||
Diagram explanations |
||||||||||
|
||||||||||
Have you made this or any other of our designs? Tag your pictures in social media with #dropsdesign so we can see them! Do you need help with this pattern?You'll find tutorial videos, a Comments/Questions area and more by visiting the pattern on garnstudio.com. © 1982-2024 DROPS Design A/S. We reserve all rights. This document, including all its sub-sections, has copyrights. Read more about what you can do with our patterns at the bottom of each pattern on our site. |
With over 40 years in knitting and crochet design, DROPS Design offers one of the most extensive collections of free patterns on the internet - translated to 17 languages. As of today we count 304 catalogs and 11422 patterns - 11417 of which are translated into English (US/in).
We work hard to bring you the best knitting and crochet have to offer, inspiration and advice as well as great quality yarns at incredible prices! Would you like to use our patterns for other than personal use? You can read what you are allowed to do in the Copyright text at the bottom of all our patterns. Happy crafting!
Comments / Questions (21)
Silvia wrote:
Quisiera patron de mañanita con mangas tejida a dos agujas con canesu redondo pero me complico para repartir los puntos para las mangas. Desde ya gracias por su ayuda.
04.08.2020 - 17:11DROPS Design answered:
Hola Silvia. En nuestra colección tenemos varios modelos de capas con el canesú redondo. En la pagina principal en el buscador escribe CAPA o MINI PONCHO.
16.08.2020 - 17:13Chollet wrote:
Il me reste 7 pelotes de merino extra fine ,en aurais-je assez pour faire ce modele? je fais du xxl merc ipour votre reponse
10.04.2020 - 11:13DROPS Design answered:
Bonjour Mme Chollet, vous n'aurez pas assez car en taille XXL il faut 700 g DROPS Merino Extra Fine, soit 14 pelotes de 50 g. Retrouvez ici tous nos modèles tricotés en Merino Extra Fine - cf également comment trouver le nombre de pelotes nécessaires Bon tricot!
14.04.2020 - 10:29Lucia wrote:
Noch eine Frage zu: "Von der Vorderseite wie folgt stricken: 5 M. Krausrippe, M1 (= 3 M.), * 7 M. li., M1 *, von *-* total 30-32-35-38-42-46 Mal und mit 5 M. Krausrippe abschliessen." Wie werden die 7 M. links in der Rückreihe gestrickt? Auch links wie die Rückreihe von M1, dann gibt es bei den 7 Maschen Krausrippen oder sollen sie glatt links gestrickt werden? Auf dem Foto der Jacke ist es nicht gut erkennbar.
05.04.2020 - 08:43DROPS Design answered:
Liebe Lucie, die 7 linke Maschen zwischen jedem M.1 werden rechts bei den Rückreihen gestrickt (diese Maschen sind glatt links gestrickt). Viel Spaß beim stricken!
09.04.2020 - 13:33Lucia wrote:
Ich habe eine Frage zu folgendem Teil der Anleitung: "Danach 1 R. auf der Vorderseite stricken und gleichzeitig gleichmässig verteilt 30-34-38-40-48-54 M. aufnehmen (nicht über der Blende) = 313-333-363-393-433-473 M." Was meinen Sie mit "nicht über der Blende"? Meinen Sie mit Blende die Ärmel, so dass ich die Maschen nur über den beiden Vorderteilen und dem Rückenteil aufnehme? Vielen Dank für Ihre Antwort.
05.04.2020 - 08:34DROPS Design answered:
Liebe Lucia, die Blende sind die 5 ersten und 5 letzten Maschen die krausrechts gestrickt sind, dh diese Maschen sollen nicht abgenommen nur die inzwischen. Viel Spaß beim stricken!
09.04.2020 - 13:32Patricia wrote:
Quisiera saber como desde el inicio del cuello se colocan 181 puntos y se comienzan a realizar las pequeñas trenzas que no esta explicado y en la foto se ve como va aumentando de tamaño y se ve que hay mas distancia entre trenza ytrenza y en la explicacion no esta!!aguardo vuest de a respuesta paracomenzar el tejido gracias
12.09.2015 - 16:10DROPS Design answered:
Hola Patricia. El chaleco se trabaja de abajo arriba. Montamos 181 pts para el borde inferior. La parte del canesú con trenzas está explicada en el patrón. Vamos a disminuir el nº de pts de revés entre las trenzas para dar la forma del canesú. Lee atentamente todo el patrón antes de comenzar a trabajar.
15.09.2015 - 09:08Patricia wrote:
Quisiera saber como desde el inicio del cuello se colocan 181 puntos y se comienzan a realizar las pequeñas trenzas que no esta explicado y en la foto se ve como va aumentando de tamaño y se ve que hay mas distancia entre trenza ytrenza y en la explicacion no esta!!aguardo vuest de a respuesta paracomenzar el tejido gracias
12.09.2015 - 16:09DROPS Design answered:
Hola Patricia. El chaleco se trabaja de abajo arriba. Montamos 181 pts para el borde inferior. La parte del canesú con trenzas está explicada en el patrón. Vamos a disminuir el nº de pts de revés entre las trenzas para dar la forma del canesú. Lee atentamente todo el patrón antes de comenzar a trabajar.
15.09.2015 - 09:10Lyda wrote:
D'abord bonsoir. voila j'ai terminé le gilet,je tenais a vous remercier car c'est en parti grace a vous merci pour votre aide .heureusement car sans vous,j'étais parfois bloquée.en tout ças merci encore il est super beau.bonne soirée
28.02.2015 - 18:01Lyda wrote:
Bonjour voila j'ai un probleme au diminutions.on demande de faire 6 diminutions sur 7 mailles envers a chaque dim il faut dim d'une maille a gauche et d'une a droite au bout de la troisime dim il va me rester 1 maille je ne voit pas comment faire six diminutions.merci
20.02.2015 - 11:56DROPS Design answered:
Bonjour Lyda, les diminutions se font alternativement au début et à la fin des sections env, c'est-à-dire à la 1ère diminution, vous tricotez 2 m ens à l'env au début de chacune des sections envers, à la 2ème diminution, vous tricotez 2 m ens à l'env à la fin de chacune des sections envers et ainsi de suite. Bon tricot!
20.02.2015 - 13:47Lyda wrote:
Bonjour. j'ai un petit problème.(pour moi taille l)il est ecrit monter 65 mailles sur les 8 rabattues comment fait-on? faut-il prendre une autre pelote.la je bloque.merci pour votre future réponse et bonne journée
12.02.2015 - 15:13DROPS Design answered:
Bonjour Lyda, les 8 m ont été rabattues pour l'emmanchure, vous montez ensuite les mailles pour la manche, soit 65 m après avoir tricoté le devant droit, vous tricotez ensuite le dos, puis montez 65 m pour la 2e manche, au-dessus des 8 m rabattues pour l'emmanchure et continuez en tricotant le devant gauche - cf vidéo ci-dessous pour monter les mailles entre le devant droit et le dos + entre le dos et le devant gauche. Bon tricot!
12.02.2015 - 15:39Calsat wrote:
Bonjour. a ce gilet je voudrais le tricoter en y ajoutant du glitter argenté ,combien de bobines me faudrait-il svp.merci
16.09.2014 - 15:29DROPS Design answered:
Bonjour Mme Calsat, il vous faut calculer le métrage total nécessaire pour votre taille et diviser par le métrage d'une bobine de Glitter pour connaître le nbe de Glitter nécessaire. Pensez à demander conseil auprès de votre magasin DROPS si vous n'êtes pas sûre. Bon tricot!
16.09.2014 - 16:51