
Popular categories
Looking for a yarn?


|
||||||||||
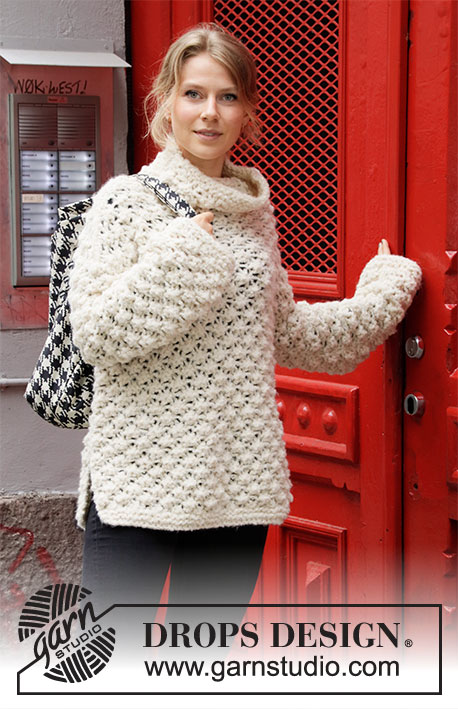
Falling Flakes |
||||||||||
 |
 |
|||||||||
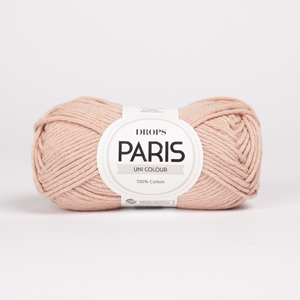
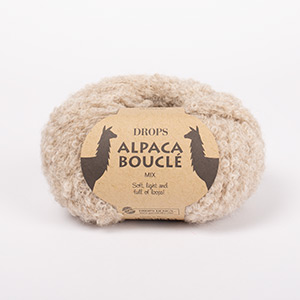
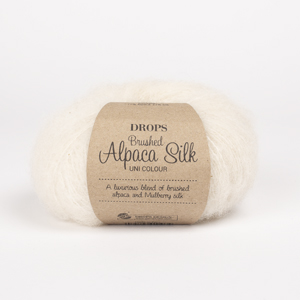
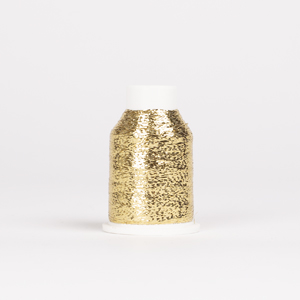
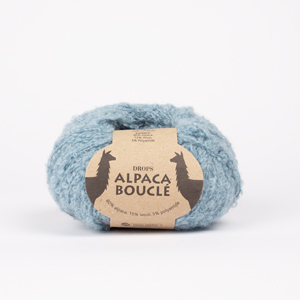
Knitted jumper in DROPS Alpaca Bouclé, DROPS Brushed Alpaca Silk and DROPS Glitter. Piece is knitted with blackberry pattern and high collar. Size: S - XXXL
DROPS 205-52 |
||||||||||
|
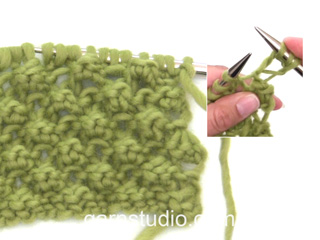
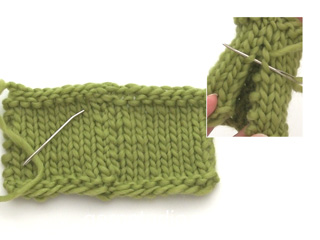
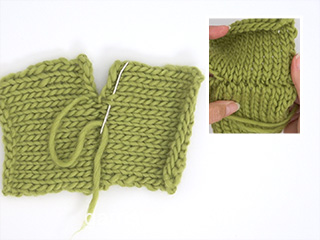
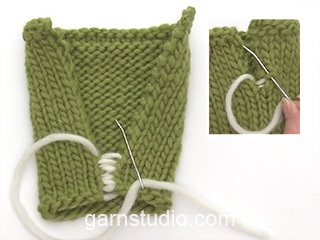
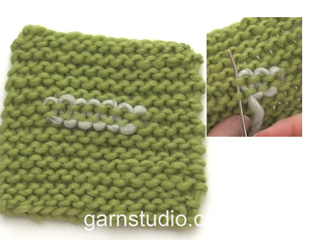
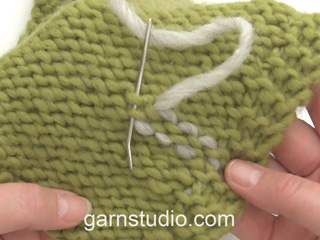
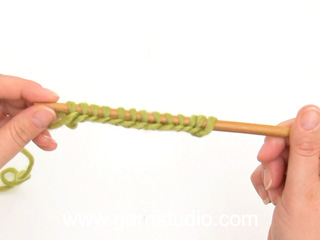
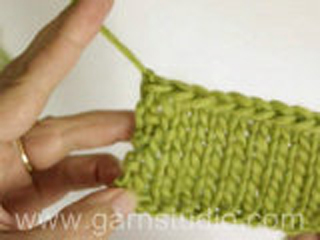
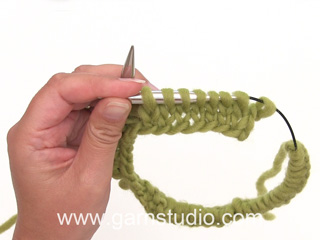
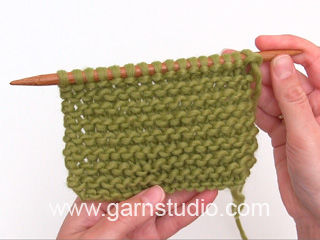
---------------------------------------------------------- EXPLANATION FOR THE PATTERN: ---------------------------------------------------------- GARTER STITCH (back and forth): Knit all rows. 1 ridge vertically = knit 2 rows. INCREASE/DECREASE TIP (evenly): To calculate how to increase/decrease evenly, use the total number of stitches on row (e.g. 41 stitches) and divide stitches by number of increases/decreases to be done (e.g. 5) = 8.2. In this example increase by making 1 yarn over after approx. every 8th stitch. On next row work yarn overs twisted to avoid holes. If decreasing knit approx. every 7th and 8th stitch together. PATTERN: See diagram A.1. Diagrams show all rows in pattern seen from the right side. ---------------------------------------------------------- START THE PIECE HERE: ---------------------------------------------------------- JUMPER - SHORT OVERVIEW OF THE PIECE: Worked back and forth on circular needle in parts and sewn together when finished. FRONT PIECE: Cast on 41-45-48-52-55-63 stitches on circular needle size 10 mm with 2 strands Alpaca Bouclé + 2 strands Brushed Alpaca Silk + 1 strand Glitter (= 5 strands). Work 2 ridges in GARTER STITCH - read explanation above. Switch to circular needle size 12 mm, knit 1 row from right side while increasing 5-5-6-6-7-7 stitches evenly - read INCREASE/DECREASE TIP = 46-50-54-58-62-70 stitches. Work next row as follows from wrong side: Work 1 edge stitch in garter stitch, work A.1 until 1 stitch remains on row (= 11-12-13-14-15-17 repetitions of 4 stitches), finish with 1 edge stitch in garter stitch. Continue pattern like this. REMEMBER THE KNITTING TENSION. When piece measures 43-45-45-47-47-49 cm, insert 1 marker in each side. Markers show where armholes begin. Work until piece measures 60-62-64-66-68-70 cm, adjust so that next row is worked from right side. Now cast off for shoulder, i.e. work next row as follows from right side: Cast off 12-12-12-16-16-18 stitches for shoulder, work 1 stitch in garter stitch, continue A.1 over the next 20-24-28-24-28-32 stitches, work 1 stitch in garter stitch and cast off the remaining 12-12-12-16-16-18 stitches. Cut the yarn. Then work high collar as explained below. HIGH COLLAR: = 22-26-30-26-30-34 stitches on row. Continue A.1 back and forth on circular needle size 12 mm as before with 1 edge stitch in garter stitch in each side. When neck measures approx. 18-18-20-20-22-22 cm from shoulder, switch to circular needle size 10 mm. Work from right side and work 2 ridges back and forth over all stitches, AT THE SAME TIME on first row decrease 3 stitches evenly = 20-24-28-24-28-32 stitches. When ridges have been worked, loosely cast off by knitting from right side. BACK PIECE: Cast on same number of stitches as on front piece and work the same way as on front piece. When stitches on shoulder have been cast off, work high collar the same way as on front piece. I.e. front piece and back piece are identical. SLEEVE: Sleeves are worked back and forth on circular needle, top down. Cast on 30-30-34-34-38-38 stitches on circular needle size 12 mm with 2 strands Alpaca Bouclé + 2 strands Brushed Alpaca Silk + 1 strand Glitter (= 5 strands). Knit 1 row (= right side). Work next row as follows from wrong side: Work 1 edge stitch in garter stitch, work A.1 until 1 stitch remains on row (= 7-7-8-8-9-9 repetitions of 4 stitches), finish with 1 edge stitch in garter stitch. Continue pattern like this until sleeve measures approx. 47-45-44-43-42-38 cm (approx. 2 cm remain until finished measurements, or continue to desired length), but adjust so that next row is worked from right side. NOTE! Shorter measurements in the larger sizes because of wider shoulders. Switch to circular needle size 10 mm. Work from right side and work 2 ridges back and forth over all stitches, AT THE SAME TIME on first row decrease 2-2-4-4-4-4 stitches evenly = 28-28-30-30-34-34 stitches. When ridges have been worked, loosely cast off by knitting from right side. Work the other sleeve the same way. ASSEMBLY: Sew shoulder seams inside cast-off edge. Sew neck together in the each side - sew edge to edge in outer loop of edge stitch so that the seam is flat. Sew in sleeves between markers for armholes, sew in outer loops of edge stitch and make sure to avoid a tight seam. Sew underarm seams and side seams in one - begin at the bottom of sleeve and sew in outer loops of edge stitches to avoid a chunky seam, but leave approx. 12 cm in each side of front and back piece for vents. |
||||||||||
Diagram explanations |
||||||||||
|
||||||||||

|
||||||||||
|
Have you made this or any other of our designs? Tag your pictures in social media with #dropsdesign so we can see them! Do you need help with this pattern?You'll find tutorial videos, a Comments/Questions area and more by visiting the pattern on garnstudio.com. © 1982-2024 DROPS Design A/S. We reserve all rights. This document, including all its sub-sections, has copyrights. Read more about what you can do with our patterns at the bottom of each pattern on our site. |
||||||||||


With over 40 years in knitting and crochet design, DROPS Design offers one of the most extensive collections of free patterns on the internet - translated to 17 languages. As of today we count 304 catalogues and 11422 patterns - 11422 of which are translated into English (UK/cm).
We work hard to bring you the best knitting and crochet have to offer, inspiration and advice as well as great quality yarns at incredible prices! Would you like to use our patterns for other than personal use? You can read what you are allowed to do in the Copyright text at the bottom of all our patterns. Happy crafting!
Comments / Questions (9)
Buongiorno, mi piacerebbe realizzare con gli stessi materiali di questo modello e con lo stesso punto mimosa il poncho modello Creme Caramel nella taglia S. Quanti grammi occorrono di Alpaca Bouclé, di Brushed Alpaca Silk e quanto glitter? Grazie. Marta
17.12.2021 - 10:09DROPS Design answered:
Buongiorno Marta, per un aiuto così personalizzato può rivolgersi al suo rivenditore DROPS di fiducia. Buon lavoro!
20.12.2021 - 08:22Al posto di 5 fili ( tre tipi differenti di filato) c'è un solo filato della grossezza corrispondente che mi permetta di ottenere la stessa maglia. grazie
06.01.2021 - 11:10DROPS Design answered:
Buongiorno Bruna, può provare con il filato Polaris che appartiene al gruppo filati F. controllando sempre che il suo campione corrisponda a quello indicato. Buon lavoro!
07.01.2021 - 08:57Bonjour, Je commence ce pull et j’ai du mal à comprendre le diagramme A1. Les mailles semblent décalées. Est-ce que cela veut dire que sur l’endroit toutes les mailles ne sont pas à l’envers ? En fait, pour le premier rang après les côtes en mousse, comment tricoter le jeté (est-ce qu’on doit le tricoter trois fois comme indiqué dans A1 ?). En somme, comment lire A1 ?
28.09.2020 - 23:17DROPS Design answered:
Bonjour Lyne, les mailles sont décalées dans le diagramme car la 1ère maille va être d'abord tricotée 3 fois (= 2 augmentations) puis tricotez à l'envers sur l'endroit et enfin au rang suivant sur l'envers, on va diminuer ces 3 m à 1 seule m, et en parallèle, on va diminuer 3 m à 1 m, tricoter 1 m env sur l'end, augmenter 2 m dans cette m (= on a maintenant 3 m) et tricoter ces 3 m à l'env sur l'end. Cette vidéomontre comment tricoter ce point et cette leçon explique comment lire les diagrammes. Bon tricot!
29.09.2020 - 08:00Der Pullover sieht einfach toll aus. Gefällt mir sehr gut.
07.10.2019 - 21:27Per chi non conosce i confetti di Pistoia sono uguali: zucchero bianco a riccio e dentro pistacchio ;)
29.09.2019 - 13:14Jersey Pompom 😜
15.08.2019 - 17:55Delicadeza y ternura
10.07.2019 - 06:16Would love to knit it
04.07.2019 - 14:54Miss snowwoman;-))
09.06.2019 - 19:47